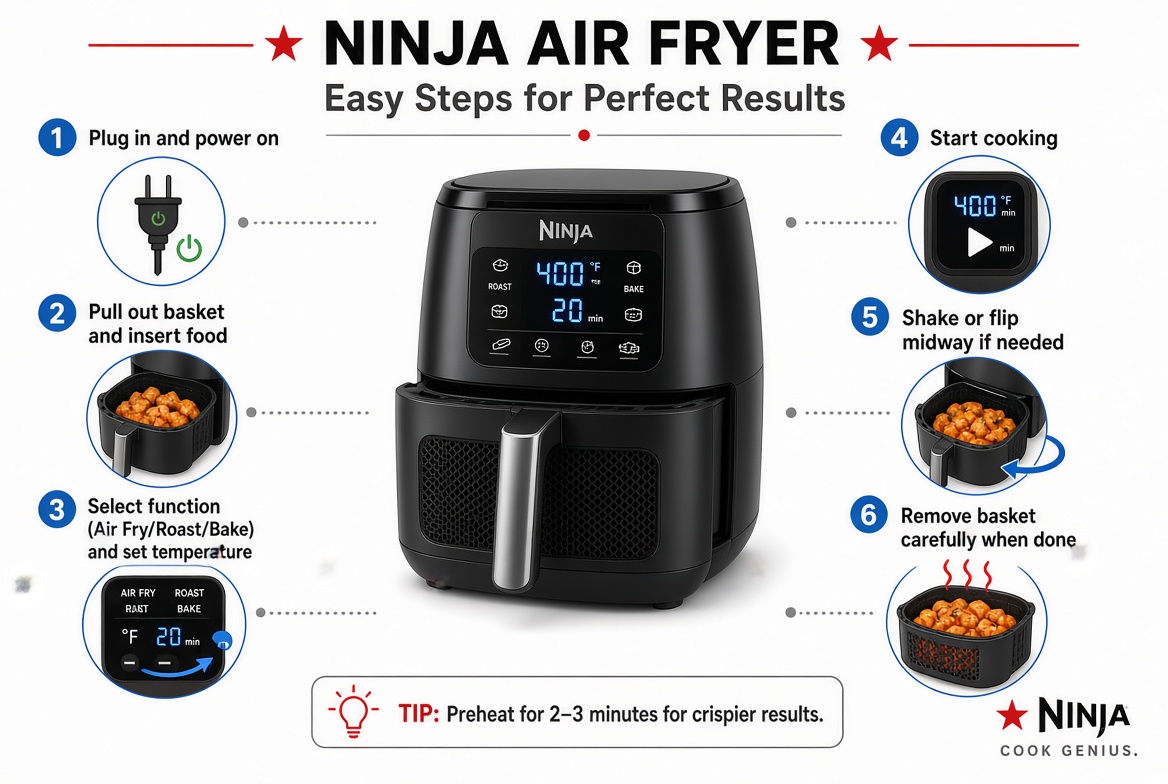
Ninja Air Fryer Instructions
If you just brought home a Ninja air fryer, get ready for a whole new way to cook. This handy kitchen gadget turns out crispy fries, juicy chicken, and even baked goods without drowning everything in oil. But like any new appliance, it helps to know how it works before you dive in. This guide walks you through every step, from unboxing to cleaning, using plain and simple words so anyone can follow along.
By the end of this article, you’ll know how to set up your Ninja air fryer, use its different cooking modes, cook popular foods the right way, and keep the machine running well for years. Let’s get started.
In this article
What Is a Ninja Air Fryer and How Does It Work
A Ninja air fryer is a countertop appliance that cooks food by blasting it with hot air at high speed. Instead of dunking food in a pot of oil like old-school deep fryers, it uses a fan and a heating element to circulate hot air around your food. This gives you that crispy, golden texture you love, but with a fraction of the oil and fat.
The result is food that tastes fried but is actually much healthier. Think crunchy fries, crispy chicken wings, and roasted veggies, all cooked with just a light spray of oil or sometimes none at all.
Ninja makes several air fryer models, including the Ninja Foodi, Ninja Air Fryer Max XL, Ninja Dual Zone, and other versions. While the exact buttons and layout may differ slightly between models, the basic steps for using them stay pretty much the same.
Unboxing and Setting Up Your Ninja Air Fryer
Before you cook anything, take a few minutes to set up your machine properly. Rushing this step can lead to a messy first cook or even a startup issue.
Step 1: Remove All Packaging
Take the air fryer out of the box and remove every sticker, foam piece, and plastic wrap. Check inside the basket and drawer too, since manufacturers often tuck extra padding in there to protect the parts during shipping.
Step 2: Wash the Removable Parts
Pull out the basket and crisper plate (sometimes called a cooking tray) and wash them with warm, soapy water. Dry everything fully before putting the parts back into the machine. This gets rid of any dust or manufacturing residue that might affect the taste of your first meal.
Step 3: Find a Good Spot for the Appliance
Place your air fryer on a flat, heat-resistant countertop. Leave at least five inches of space on every side, including the back and top, so hot air can vent properly. Never place it directly against a wall or under a cabinet, since the steam and heat it releases needs somewhere to go.
Step 4: Plug It In and Power On
Plug the unit into a wall outlet, then press the power button. The screen or dial should light up, letting you know the machine is ready to go.
Understanding the Control Panel
Ninja air fryers usually come with a digital touchscreen or a dial-and-button setup, depending on the model. Here’s a rundown of the buttons and functions you’ll come across most often.
- Air Fry: The main setting for crispy, fried-style cooking with hot circulating air.
- Max Crisp: A higher-heat setting that gives extra crunch, great for frozen foods.
- Roast: Ideal for meats and vegetables that need slower, even cooking.
- Bake: Works well for cakes, muffins, and other baked treats.
- Reheat: Warms up leftovers without drying them out.
- Dehydrate: Removes moisture from foods like fruit slices or jerky over several hours.
- Broil: Adds a browned, crispy top layer to dishes.
- Temp and Time dials or buttons: Let you set how hot the machine gets and how long it runs.
Take a minute to look over your manual since some models, like the Dual Zone, have two separate baskets that can run different settings at the same time.
How to Preheat Your Ninja Air Fryer
Preheating isn’t always required, but it does help food cook more evenly, especially with items like frozen snacks or baked goods. Here’s the simple way to do it:
- Press the function you plan to use, such as Air Fry or Bake.
- Set your temperature to match your recipe.
- Press the Preheat button if your model has one, or just let the machine run empty for around three to five minutes.
- Once it beeps or the display shows it’s ready, add your food to the basket.
Skipping this step won’t ruin your meal, but your cooking time might run a little longer than the recipe suggests.
Step-by-Step Cooking Instructions
Now for the fun part: actually cooking. Follow these steps any time you use your Ninja air fryer, no matter what dish you’re making.
Step 1: Prep Your Food
Cut your ingredients into even-sized pieces so they cook at the same rate. Pat wet foods dry with a paper towel, since extra moisture can stop food from getting crispy. Add a light coat of oil if your recipe calls for it, using a spray bottle or brush for even coverage.
Step 2: Load the Basket
Place your food in the basket in a single layer whenever you can. Crowding the basket blocks airflow and leads to uneven cooking, so it’s better to cook in smaller batches if you have a lot of food.
Step 3: Set the Temperature and Time
Every recipe is different, but most air fryer meals cook somewhere between 350°F and 400°F. Check your recipe or the built-in presets on your machine for guidance.
Step 4: Start Cooking
Push the basket into the unit and press start. The timer will count down, and the fan will start circulating hot air right away.
Step 5: Shake or Flip Halfway Through
For crispy results, pull the basket out around the halfway mark and give it a shake, or use tongs to flip larger pieces like chicken or fish. This helps every side get that golden crunch.
Step 6: Check for Doneness
Once the timer ends, check your food. Use a meat thermometer for proteins to make sure they’ve hit a safe internal temperature. Add a few extra minutes if needed.
Step 7: Remove and Serve
Carefully take the basket out using the handle, since it will be hot. Tip the food onto a plate or serving dish and enjoy right away for the best texture.
Cooking Times and Temperatures for Popular Foods
Here’s a quick reference chart for some common dishes. Keep in mind that cook times can shift slightly based on your specific model and how full the basket is.
| Food | Temperature | Cook Time |
|---|---|---|
| Frozen French fries | 400°F | 15-18 minutes |
| Chicken wings | 380°F | 20-25 minutes |
| Chicken breast | 375°F | 18-22 minutes |
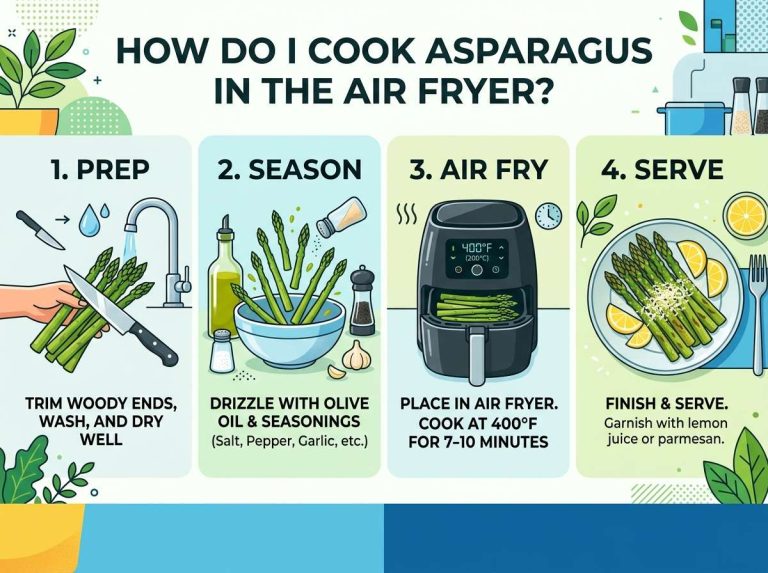
| Salmon fillet | 390°F | 10-12 minutes |
| Bacon | 350°F | 8-10 minutes |
| Roasted vegetables | 375°F | 12-15 minutes |
| Frozen mozzarella sticks | 390°F | 8-10 minutes |
| Homemade fries | 380°F | 20-25 minutes |
| Steak | 400°F | 10-14 minutes |
| Baked potato | 400°F | 35-40 minutes |
Always check your food a few minutes before the suggested time ends, since thickness and starting temperature can change how fast things cook.
Using the Dual Zone or Two-Basket Models
If you own a Dual Zone Ninja air fryer, you get two separate baskets that let you cook two different foods at once, even at different temperatures. This is great for a full meal, like chicken in one basket and fries in the other.
Here’s how the smart finish feature usually works:
- Load both baskets with your chosen foods.
- Set the temperature and time for each basket separately.
- Use the Match function if you want both baskets to finish cooking at the exact same moment, even if their cook times differ.
- Press start and let the machine handle the timing for you.
This feature saves a ton of time on busy nights when you want a full plate ready all at once.
Tips for Getting the Crispiest Results
A few small tricks can make a big difference in how your food turns out.
- Don’t skip drying your food before cooking, since moisture is the enemy of crispiness.
- Use a light oil spray rather than pouring oil directly, so you avoid soggy spots.
- Avoid overcrowding the basket, even if it means running an extra batch.
- Shake or flip food at least once during cooking for even browning.
- Try parchment liners made for air fryers if you’re cooking sticky or saucy foods, but always leave gaps for airflow.
- Let food rest for a minute or two after cooking so the outside stays crunchy instead of steaming itself soft.
Cleaning and Maintaining Your Ninja Air Fryer
Keeping your air fryer clean helps it last longer and keeps your food tasting fresh, without any leftover flavors from past meals.
After Every Use
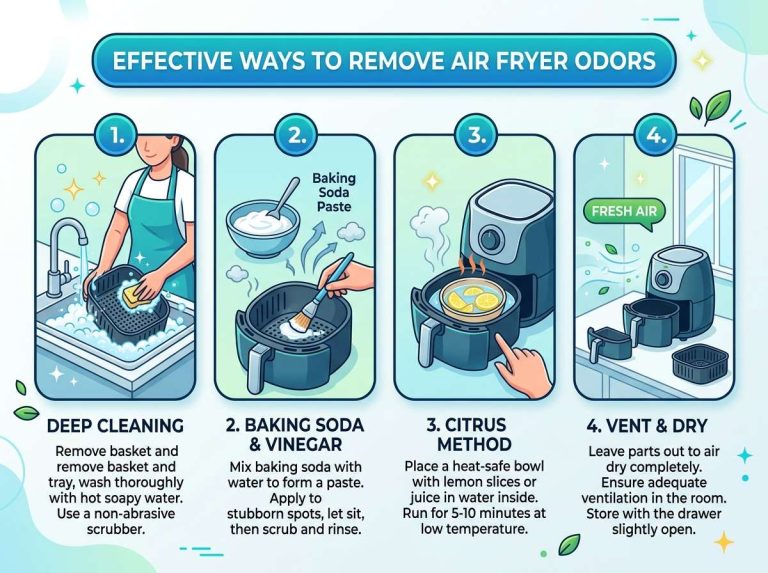
Let the unit cool down fully before touching any parts. Remove the basket and crisper plate, then wash them with warm water and dish soap. Most Ninja air fryer parts are dishwasher safe, but check your manual to be sure about your specific model.
Wipe Down the Main Unit
Use a damp cloth to wipe the inside and outside of the main housing. Never submerge the main unit in water, since it holds the electrical parts and heating element.
Deep Cleaning Once a Week
If you use your air fryer often, give it a deeper clean weekly. Soak the basket in warm, soapy water for about ten minutes to loosen any stuck-on grease, then scrub gently with a soft sponge. Avoid using metal scouring pads, since they can scratch the non-stick coating.
Check the Heating Element
Every so often, peek inside at the heating coil near the top of the unit. If you spot grease buildup, unplug the machine and gently wipe it with a damp cloth once it’s fully cooled.
Common Mistakes to Avoid
Even easy-to-use gadgets like the Ninja air fryer can trip up beginners. Here are a few slip-ups worth steering clear of:
- Overfilling the basket: This blocks airflow and leaves food soggy instead of crispy.
- Using too much oil: A drizzle goes a long way; too much can create smoke or a greasy result.
- Skipping the shake or flip step: This causes uneven cooking, with one side crispy and the other pale.
- Not preheating for baked goods: Cakes and pastries often need a hot start for the best rise and texture.
- Ignoring the manual for your specific model: Every Ninja air fryer has small differences, so it pays to glance through the included guide.
Troubleshooting Common Issues
Running into a hiccup? Here are quick fixes for problems people run into most often.
Food isn’t getting crispy: Try adding a touch more oil, reduce how much food is in the basket, and make sure you’re flipping halfway through.
The unit won’t turn on: Check that it’s plugged into a working outlet and that the basket is pushed in all the way, since most models won’t start unless it’s properly seated.
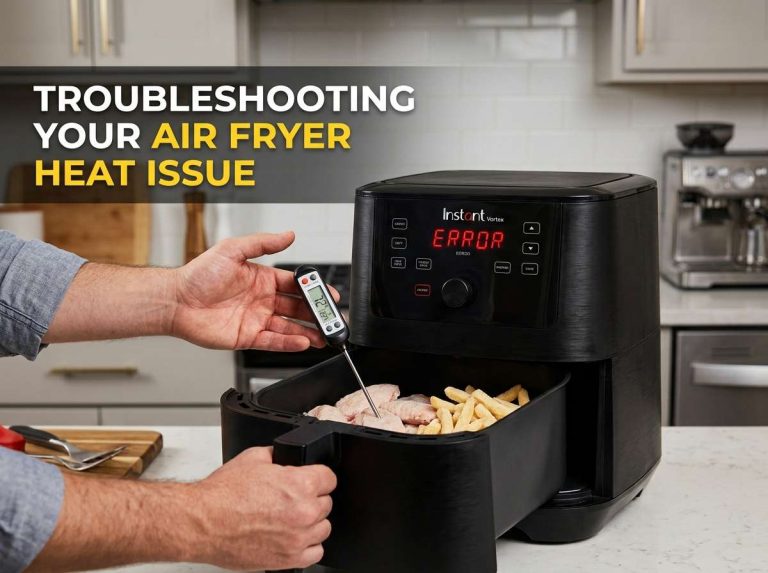
Smoke is coming from the unit: This usually means there’s grease buildup on the heating element or too much oil dripping down. Turn off and unplug the machine, let it cool, then clean it thoroughly before your next use.
Food is cooking unevenly: Cut ingredients into similar sizes, avoid stacking pieces on top of each other, and shake the basket partway through cooking.
The display shows an error code: Check your manual for the specific code meaning, since this varies across different Ninja models.
Safety Tips to Keep in Mind
Air fryers are generally safe kitchen tools, but a few basic habits go a long way toward keeping you and your kitchen safe.
- Keep the appliance on a stable, flat surface away from the edge of the counter.
- Never place anything on top of the unit while it’s running, since hot air needs to vent from the top.
- Use oven mitts or a towel when handling the basket, since the handle and drawer get hot during cooking.
- Keep the cord away from water and other hot surfaces.
- Don’t leave the machine running unattended for long stretches, especially the first few times you use it.
Final Thoughts
Getting comfortable with your Ninja air fryer takes just a few cooking sessions. Once you get the hang of prepping food, setting the right temperature, and giving the basket a shake here and there, you’ll be turning out crispy, tasty meals with barely any cleanup. From quick weeknight dinners to healthier versions of your favorite fried snacks, this appliance earns its spot on the counter fast.
Keep this guide handy for your first few weeks of cooking, and soon enough, using your air fryer will feel as natural as turning on the stove. Happy cooking!

Mary is a home cooking enthusiast and kitchen appliance reviewer who loves helping people find the best tools for everyday meals. She enjoys testing air fryers, deep fryers, and other cooking appliances while sharing honest reviews and practical buying advice. Through FryerPick.com, Mary provides expert guides, product comparisons, and cooking tips to help readers choose the right fryer for their kitchen.