How to Air Fry Chicken Breast?
If you’re tired of dry, tough chicken breast, it’s time to meet your new best friend: the air fryer. This little kitchen gadget has completely changed how people cook chicken at home. You get juicy, tender meat with crispy edges in just a few minutes. No mess, no stress, and honestly? The results blow oven-baked chicken out of the water.
Let me walk you through everything you need to know about air frying chicken breast. By the end of this guide, you’ll be making restaurant-quality chicken right in your own kitchen.
In this article
Why Air Fryers Are Perfect for Chicken Breast
Before we jump into the how, let’s talk about why an air fryer works so well for chicken. Traditional cooking methods often leave chicken dry and flavorless. The oven takes too long. Stovetop cooking can be uneven. But air fryers? They solve all these problems.
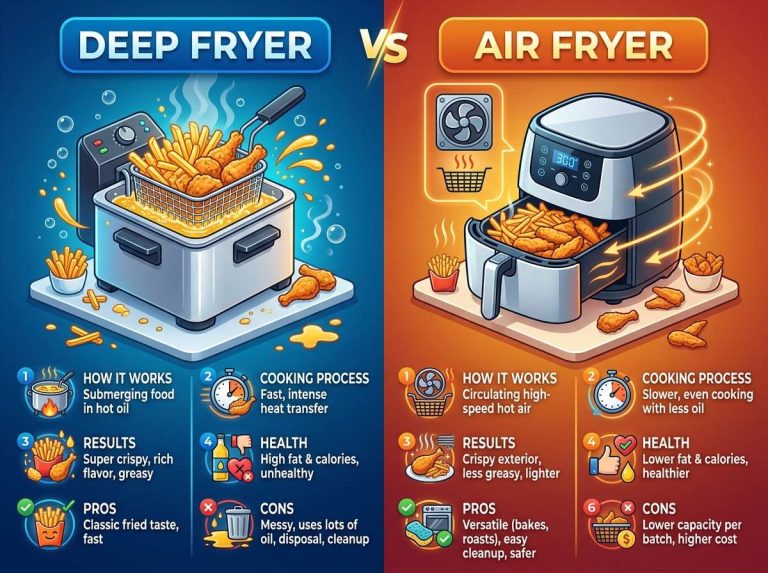
Air fryers use hot air circulation to cook food quickly and evenly. The heat surrounds your chicken breast from all angles, cooking it fast while keeping the inside moist and tender. The outside gets crispy without any oil (or with just a tiny bit). You get that restaurant-quality texture at home in minutes.
The speed is a game changer. Most chicken breasts cook in 12 to 15 minutes. Compare that to 25 to 30 minutes in a traditional oven. That’s almost half the time. For busy people, this is huge. You can have dinner ready before you know it.
Another big win is that you don’t have to flip your chicken. Just put it in the basket and walk away. The air fryer does all the work. This makes the whole process foolproof, even for beginners.
Picking the Right Chicken Breast
Your success starts before the air fryer even turns on. The quality of your chicken breast matters.
Fresh chicken is always better than frozen if you can get it. Look for breasts that are pale pink, firm to the touch, and smell fresh. If it smells fishy or off, don’t buy it.
Size counts too. Try to pick chicken breasts that are roughly the same thickness. If you have one huge breast and one tiny one, they’ll cook at different speeds. Uneven chicken is the last thing you want.
If your breasts are really thick, you have two options. Pound them down with a meat mallet to even them out, or slice them horizontally to make them thinner. Both methods work great. Thinner breasts cook faster and more evenly.
Frozen chicken works fine, but you’ll need to thaw it first. Pop it in the fridge overnight or use the cold water method (seal it in a bag and soak in cold water for a few hours). Cooking frozen chicken in an air fryer takes longer and doesn’t give you as good results.
Preparing Your Chicken Breast
Preparation is where your chicken goes from good to amazing.
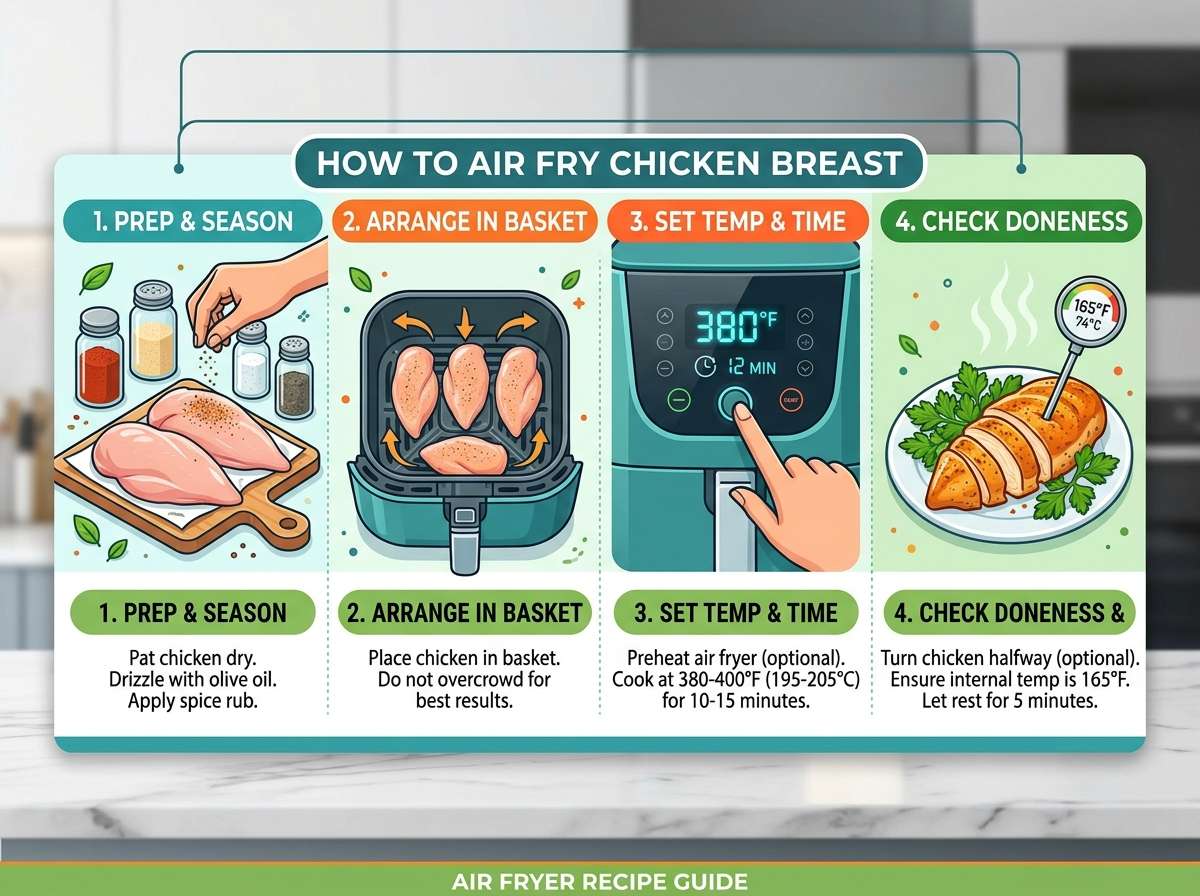
Start by patting your chicken breast dry. Use paper towels and really get the surface moisture off. This step is key to getting that crispy exterior. Dry chicken crisps up beautifully. Wet chicken stays a bit soft.
Now comes the seasoning. You have total freedom here. Keep it simple with just salt and pepper, or get creative with your favorite spice blends. All-purpose seasoning, garlic powder, paprika, Italian seasoning, cumin, cajun spices—it all works. The air fryer doesn’t judge.
If you want extra flavor, try a quick marinade. Even 15 minutes in Italian dressing, teriyaki sauce, or buttermilk makes a huge difference. But this is totally optional. Plain seasoned chicken tastes great too.
A tiny bit of oil helps your seasoning stick and gives you better browning. A light spray or a drizzle of cooking oil works perfectly. You don’t need much. Just enough to coat the surface lightly.
Let your chicken sit for a few minutes after seasoning. This gives the flavors time to sink in a little bit before cooking.
Getting Your Air Fryer Ready
Preparing your air fryer takes just a couple of minutes.
First, check that your air fryer basket is clean. You want no leftover bits from previous cooking. A quick wipe with a damp cloth does the job.
Some people use parchment paper or aluminum foil in the basket. This is totally fine and makes cleanup easier. Just make sure the paper doesn’t cover all the holes in the basket. Air needs to circulate underneath your chicken. If you use foil, poke some holes in it.
You don’t have to use parchment paper, though. Cooking directly on the basket works great and gives you the crispiest results. Just be ready to clean it after.
Preheat your air fryer to 360 to 380 degrees Fahrenheit. Most recipes call for somewhere in this range. Higher heat cooks faster but can burn the outside. Lower heat cooks slower and more gently. For chicken breast, this middle ground is perfect.
Preheating only takes about 3 minutes. Some air fryers beep when they’re ready. Others don’t, so set a quick timer on your phone.
The Cooking Process
This is where the magic happens.
Place your prepared chicken breast in the air fryer basket skin-side up. Try not to crowd them. They should have a little space between each piece so hot air can flow around every side. If you’re cooking multiple breasts, arrange them in a single layer.
Set your air fryer to 360 degrees Fahrenheit. Cook for 12 to 15 minutes depending on how thick your chicken is. Thinner breasts need about 12 minutes. Thicker ones might need 14 to 15 minutes.
You don’t need to flip your chicken. This is one of the best parts about air fryers. Just set it and forget it.
When the time is almost up, check your chicken. The outside should look golden and crispy. The color should be a beautiful tan-gold, not white and not dark brown. If it’s still too pale, give it 2 more minutes.
Use a meat thermometer to check doneness. Insert it into the thickest part of the breast. Chicken breast is fully cooked at 165 degrees Fahrenheit. This is the safe temperature to eat. If you don’t have a meat thermometer, cut into the thickest part. There should be no pink inside, and the juices should run clear.
Getting Perfect Results Every Time
Once you understand the basics, getting consistently great chicken is easy.
Thickness is everything. The thicker your chicken, the longer it needs to cook. A half-inch thick breast cooks in about 12 minutes. An inch thick breast might need 15 to 17 minutes. If you pound your breasts to even thickness, you’ll get even cooking.
Temperature control matters. Different air fryer brands work a little differently. Some run hotter than others. Start at 360 degrees and adjust based on what you get. If your first batch comes out too dry, lower the heat by 10 degrees next time. If it’s too pale, raise it by 10 degrees.
Don’t skip the drying step. Moisture is the enemy of crispiness. The drier your chicken breast starts, the crispier it gets.
Let your chicken rest for 3 to 5 minutes after cooking. This sounds strange, but it works. The juices redistribute, and your chicken stays more tender and moist when you cut into it.
Seasoning and Flavor Ideas
Plain salt and pepper chicken tastes great. But why stop there? Here are tons of easy flavor combos you can try.
Go classic with garlic powder, onion powder, and black pepper. This combo works on literally everything. You’ll use it again and again.
Try an Italian vibe with dried oregano, basil, garlic powder, and a tiny sprinkle of red pepper flakes. Serve it over pasta and you’ve got dinner.
Make it spicy with cajun seasoning, cumin, paprika, and cayenne. This is perfect for making chicken tacos or rice bowls.
Go tangy with lemon juice, lemon zest, garlic, and thyme. This feels fancy but takes zero effort.
Use Asian-inspired flavors like garlic powder, ginger powder, soy sauce, and sesame oil. Serve over rice with some veggies.
Coat your chicken in your favorite dry rub before cooking. BBQ rub, steak seasoning, taco seasoning, whatever sounds good.
Try marinades for extra moisture and flavor. Buttermilk, Italian dressing, soy sauce marinade, hot sauce, or teriyaki all work beautifully. Just marinate for 15 minutes to a few hours, then pat dry and cook.
Cooking Multiple Chicken Breasts
What if you need to cook more than two breasts at once?
If your air fryer is big enough, you can fit a few breasts in the basket. Just remember: they need space between them. Touching chicken doesn’t cook evenly. Arrange them so hot air can flow around each one.
If you’re cooking a lot of chicken, batch cooking is your friend. Cook one batch, take it out, and start the next one. Most air fryers come back to temperature super fast, so the second batch only takes a few minutes longer overall.
Another option is to chop your chicken into smaller pieces before cooking. Chicken tenders, cubes, or strips all work great. Smaller pieces cook faster—about 9 to 12 minutes depending on size. This is perfect if you want to make chicken nuggets, stir-fry, or rice bowls.
Storing and Reheating Your Air Fried Chicken
Leftover chicken breast is a gift. It keeps for 3 to 4 days in the fridge in an airtight container.
Reheat it right in your air fryer. Set it to 320 degrees and cook for 3 to 5 minutes until heated through. This keeps your chicken moist and maintains that crispy texture. Reheating in the microwave makes it rubbery, so skip that.
Frozen cooked chicken lasts about 2 to 3 months. Let it thaw in the fridge before reheating.
Use your leftover chicken in salads, wraps, tacos, pasta dishes, rice bowls, or sandwiches. It’s incredibly versatile.
Common Mistakes and How to Fix Them
Even with a simple process, a few things can go wrong.
Dry chicken usually means you cooked it too long or too hot. Lower your temperature by 10 degrees next time and check doneness at the shorter end of your time range. Remember, 165 degrees is fully cooked. You don’t need to go higher.
Undercooked chicken means you didn’t cook it long enough. If your air fryer runs cool, add a few extra minutes. Trust your meat thermometer.
Uneven cooking happens when your chicken breasts are different thicknesses. Pound them to even thickness before cooking. Or separate thin and thick pieces and cook them at different times.
Pale, rubbery chicken usually means you’re not getting enough heat or you skipped the seasoning step. Check your temperature, make sure your air fryer is preheated, and always season generously.
Burned chicken means your heat is too high. Lower it to 360 degrees and add a couple extra minutes to your cooking time.
Flavorless chicken means you didn’t season enough. Don’t be shy with salt and pepper. Taste as you learn what amount you like.
FAQs About Air Frying Chicken Breast
Can I cook frozen chicken breast in an air fryer?
Technically yes, but it won’t be as good. Frozen chicken takes about 5 to 7 minutes longer to cook and doesn’t brown as nicely. Thaw it overnight in the fridge for best results.
Do I need to flip my chicken?
Nope. This is one of the best parts. Just set it and go. Your chicken cooks evenly without flipping.
What’s the best temperature?
360 to 380 degrees works perfectly for most chicken breast. Start at 360 and adjust from there based on your air fryer and how thick your chicken is.
How do I make my chicken extra crispy?
Pat it super dry, give it a light coat of oil, and cook at 380 degrees. Thinner breasts also get crispier than really thick ones.
Can I cook bone-in chicken breast?
Yes, but it takes longer—about 20 to 25 minutes. Boneless, skinless breasts are faster and easier for beginners.
What size chicken breast cooks best?
Look for breasts that are roughly 6 to 8 ounces and about three-quarters of an inch thick. They cook in perfect time without drying out.
Do I need to add oil?
A light coating helps with browning and crisping. But you can skip it if you’re trying to cut calories.
Can I marinate my chicken?
Absolutely. Just pat it dry before cooking. Any extra moisture will steam instead of fry, and you won’t get as crispy results.
Best Toppings and Sides to Serve with Air Fried Chicken
Your perfectly cooked chicken breast deserves great toppings and sides.
Top it with a simple pan sauce. Melt butter with garlic, add some lemon juice or balsamic vinegar, and drizzle over your chicken. Fancy and delicious in 2 minutes.
Serve with roasted vegetables. Broccoli, Brussels sprouts, asparagus, or green beans cooked in the air fryer at the same time (though they might need different timing).
Make it a grain bowl with rice or quinoa as the base. Add your chicken, some veggies, and a sauce.
Chop it up for tacos. Shred the chicken, warm some tortillas, add toppings like salsa, guacamole, and cabbage.
Turn it into a salad. Slice your chicken and toss it over greens with your favorite dressing.
Make chicken sandwiches. Slice the breast horizontally to make it thinner, toast your bread, add toppings.
Go creamy with a simple cream sauce. Heavy cream, garlic, and herbs made in a pan on the stovetop. Your chicken will taste restaurant-quality.
Wrapping Up
Air frying chicken breast is seriously one of the easiest ways to cook this lean protein at home. You get juicy, tender, crispy chicken in under 20 minutes with minimal effort.
Start with basic salt and pepper seasoning. Get comfortable with the temperature and timing in your specific air fryer. Once you nail it, start experimenting with different seasonings and marinades. Before you know it, you’ll be making chicken breast that rivals any restaurant.
The best part? You’ll never have dry, disappointing chicken again. Your air fryer will become your secret weapon for quick, delicious meals any night of the week. That’s the power of learning how to cook chicken properly. Your future dinners are going to be amazing.

Mary is a home cooking enthusiast and kitchen appliance reviewer who loves helping people find the best tools for everyday meals. She enjoys testing air fryers, deep fryers, and other cooking appliances while sharing honest reviews and practical buying advice. Through FryerPick.com, Mary provides expert guides, product comparisons, and cooking tips to help readers choose the right fryer for their kitchen.