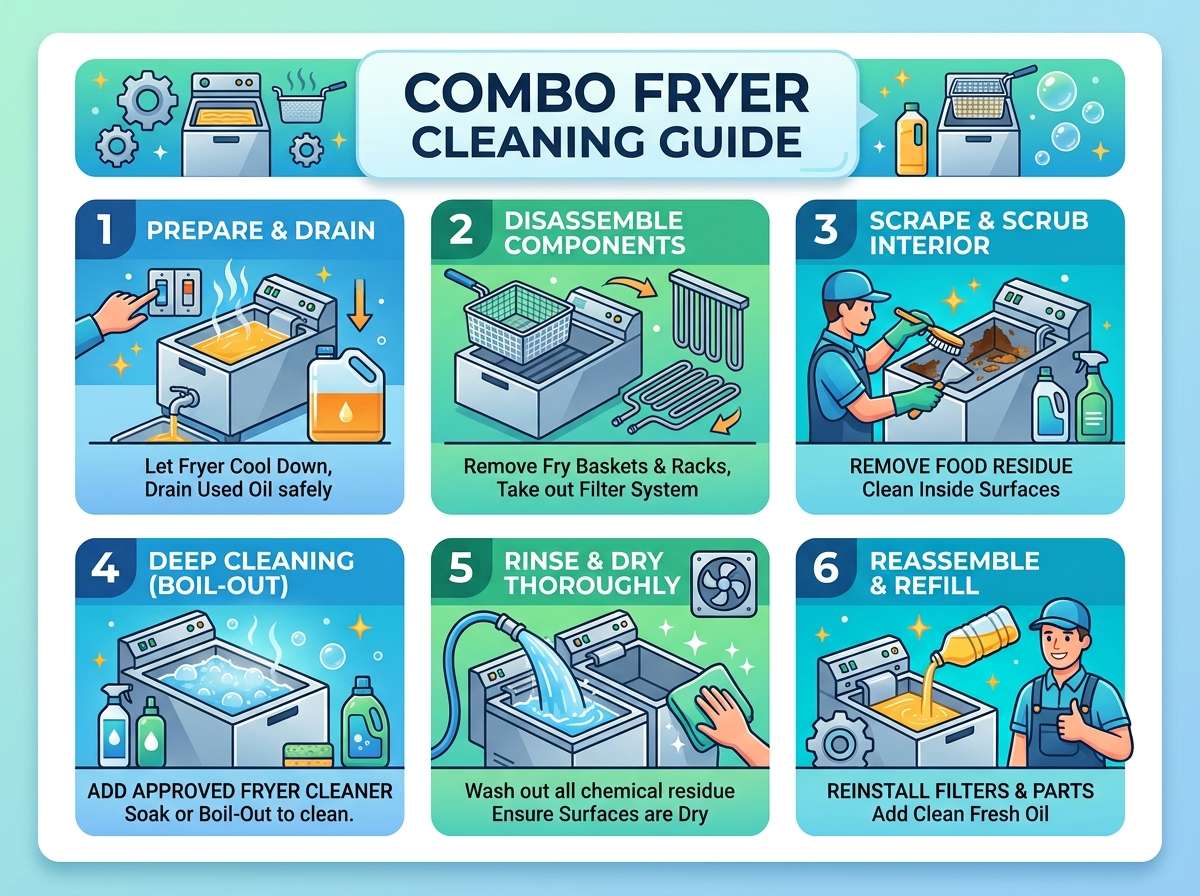
Combo Fryer Cleaning Guide
A combo fryer is one of the most useful kitchen tools you can own. It lets you fry, air fry, and sometimes even grill, all in one compact unit. But like any kitchen appliance that deals with hot oil and food splatter, it needs regular care to keep working well and staying safe to use.
If you skip cleaning for too long, grease builds up, food bits burn onto the heating parts, and your fryer starts smelling bad or cooking unevenly. The good news is that cleaning a combo fryer is not hard once you know the right steps. This guide walks you through everything, from daily wipe-downs to deep oil cleaning, using simple words and clear steps so even a total beginner can follow along.
In this article
Why Cleaning Your Combo Fryer Actually Matters
A dirty fryer is more than just an eyesore. Old oil and grease can turn rancid, which affects the taste of your food. Burnt crumbs left in the basket or at the bottom of the fry pot can catch fire if they build up near the heating element. Bacteria can grow in leftover oil and food residue too, especially if the fryer sits unused for a few days without a proper clean.
On top of the safety side, a clean fryer simply performs better. Heating elements coated in grease take longer to heat up and use more energy. Baskets covered in old oil residue trap smoke and cause food to stick. A machine that is cared for regularly will also last a lot longer before parts need replacing.
So think of cleaning not as a chore, but as basic maintenance that protects your food, your family, and your wallet.
What You Need Before You Start
Gather these supplies before you begin. Having everything ready saves time and stops you from leaving the fryer half-cleaned because you had to run to the store.
- Dish soap (a mild, grease-cutting one works best)
- Warm water
- Soft sponge or non-abrasive scrub brush
- Microfiber cloth or soft towel
- Baking soda (great for stuck-on grease)
- White vinegar (helps cut through oil and remove smells)
- Paper towels
- Rubber gloves
- A small brush or old toothbrush for tight corners
- Oil funnel and a heat-safe container for used oil
You do not need fancy cleaning products. Most of what makes a fryer spotless again is already sitting in your kitchen cabinet.
Safety First: Cool It Down Completely
Never start cleaning while the fryer is still warm. Hot oil can splash and cause serious burns, and hot metal parts can injure your hands in seconds. Unplug the unit and let it sit for at least an hour, or longer if you did a lot of frying that day. Touch the outer basket lightly with a towel first to check it has cooled before handling any parts directly.
Once it feels cool to the touch, you are ready to begin the actual cleaning process.
Step 1: Remove and Drain the Oil
Start by taking out any leftover oil. Place a heat-safe container under the drain valve if your combo fryer has one, and let the oil flow out slowly. If your model does not have a drain, use an oil funnel to pour the oil out into a container by hand.
Do not pour used frying oil down your sink. It clogs pipes over time and creates a mess for your plumbing system. Instead, let it cool completely, then either store it for reuse if it is still fresh, or dispose of it in a sealed container in your regular trash, following your local rules for grease disposal.
If the oil still looks clean and was only used once or twice, you can strain it through a fine mesh sieve or cheesecloth into a clean, dry container and reuse it next time. If it looks dark, smells off, or has lots of floating bits, it is time to toss it.
Step 2: Take Apart the Removable Parts
Most combo fryers come with parts you can take out, such as the fry basket, drip tray, oil pot or fry pan insert, and sometimes a mesh filter. Pull these pieces out carefully and set them aside for a proper soak and scrub.
Check your fryer’s manual to confirm which parts are dishwasher safe. Some baskets and trays can go straight into the dishwasher, saving you a lot of scrubbing time. Others need to be washed by hand only.
Step 3: Soak the Removable Parts
Fill your sink or a large basin with warm water and a good squirt of dish soap. Drop in the basket, tray, and any other removable pieces. Let them soak for about fifteen to twenty minutes. This softens grease and loosens burnt bits so they come off much easier.
For extra stubborn grease spots, sprinkle a little baking soda directly onto the area before soaking. Baking soda works like a gentle scrubbing agent and helps lift oil without scratching the surface.
Step 4: Scrub Away Grease and Grime
After soaking, use your sponge or soft brush to scrub each part. Pay close attention to corners, mesh holes in the basket, and any ridges where crumbs tend to hide. An old toothbrush works great here because it gets into tight spots a regular sponge cannot reach.
Avoid steel wool or anything too rough, since it can scratch nonstick coatings or damage the metal finish. Scratches actually make future cleaning harder because grease sticks more easily to rough surfaces.
Rinse each piece thoroughly with warm water once you are done scrubbing, making sure no soap residue is left behind. Soap left on cooking surfaces can affect the taste of your next batch of food.
Step 5: Clean the Fryer Body and Heating Element
Now turn your attention to the main body of the fryer, which usually cannot be submerged in water because of the electrical parts inside.
Use a damp cloth with a little dish soap to wipe down the inside walls of the fry pot. For the heating element itself, wipe gently with a soft cloth. Never dunk the heating coil or the base of the unit in water, since this can cause electrical damage or create a shock hazard.
If there is baked-on residue on the heating element, mix a paste of baking soda and a small amount of water, apply it with a cloth, let it sit for a few minutes, then wipe clean with a damp cloth. Dry the area fully before plugging the unit back in.
Step 6: Clean the Exterior
Wipe down the outside of the fryer using a damp microfiber cloth. For grease splatters on the exterior, a mix of warm water and a splash of vinegar works well to cut through oily residue and remove any lingering smell.
Wipe control panels and buttons gently, avoiding excess moisture near switches or digital displays. A slightly damp cloth followed by a dry one is the safest combination for these areas.
Step 7: Clean the Filter
If your combo fryer has an oil filter or an air filter for the air frying function, remove it and check the manual for cleaning instructions. Many filters can be rinsed under warm water and left to air dry completely before putting them back. Others may need replacing after several months of regular use.
A clogged filter reduces airflow, which affects how evenly your food cooks in air fry mode, so keeping it clean is worth the extra few minutes.
Step 8: Dry Everything Thoroughly
This step gets skipped a lot, but it matters. Any part that goes back into the fryer while still damp can cause oil to splatter dangerously during the next use, since water and hot oil do not mix well at all.
Lay all parts out on a clean towel and let them air dry fully, or dry them by hand with a soft cloth. Give it extra time in humid weather, since moisture lingers longer in the air.
Step 9: Reassemble and Do a Final Wipe
Once everything is completely dry, put the basket, tray, and any other parts back into place. Do one last wipe of the exterior and control area to remove any dust that settled while parts were drying. Your combo fryer is now ready for its next use.
Daily Quick Clean Versus Deep Clean
Not every clean needs to be a full deep clean like the steps above. Here is a simple way to split your cleaning routine.
After every use:
- Let the oil cool, then strain and store it if reusable
- Wipe crumbs out of the basket
- Wipe the exterior with a damp cloth
Once a week (or after heavy use):
- Fully drain and dispose of old oil
- Soak and scrub all removable parts
- Clean the fry pot walls and heating element
- Check and clean the filter
Once a month:
- Do a deep vinegar and baking soda scrub on stubborn grease spots
- Inspect seals, gaskets, and cords for wear
- Check the drain valve, if your model has one, for clogs
Sticking to this kind of rhythm keeps grease from ever piling up too much, and each cleaning session stays short and easy.
Common Mistakes to Avoid
A few small habits can undo all your hard work or even damage your machine. Watch out for these:
Using harsh chemicals. Bleach, ammonia, and strong oven cleaners are too aggressive for fryer surfaces and can leave behind chemical residue that transfers to food.
Submerging the whole unit in water. The base holds electrical components, and getting water inside can ruin the fryer or create a safety hazard.
Pouring hot oil straight into a plastic container. This can melt or warp plastic. Let oil cool first, or use a heat-safe container from the start.
Ignoring the filter. A clogged or greasy filter reduces performance and can trap odors that linger in your kitchen.
Skipping the drying step. Water mixed with hot oil during the next fry session can cause dangerous splattering.
Using metal scrubbers on nonstick coatings. This scratches the surface and shortens the life of your basket or fry pan insert.
Letting oil sit for weeks without draining. Old oil breaks down and can develop a rancid smell that seeps into your next batch of food.
Tips to Keep Your Combo Fryer Cleaner for Longer
A little prevention goes a long way. Try these habits to cut down on how often deep cleaning is needed:
- Pat food dry before frying to reduce splatter and oil breakdown
- Use a fry basket liner or parchment paper for air frying to catch crumbs
- Strain oil after every use to remove floating food particles
- Store your fryer with the lid slightly open so trapped moisture can escape
- Avoid overfilling the oil pot past the recommended fill line
- Keep a small brush near your fryer so quick wipe-downs feel effortless
These little steps take seconds but save you a lot of scrubbing time down the road.
Frequently Asked Questions
How often should I change the oil in my combo fryer? It depends on how often you use it and what you cook. Light use with mild foods like fries can let oil last several uses. Heavy use with breaded or strongly flavored foods breaks oil down faster, so change it more often if it looks dark or smells odd.
Can I put the fry basket in the dishwasher? Many baskets are dishwasher safe, but always check your specific model’s manual first, since coatings and materials vary between brands.
Why does my fryer smell bad even after cleaning? This usually means old oil residue is trapped somewhere hard to reach, like in the drain valve or corners of the fry pot. A vinegar wipe-down or baking soda soak on those spots often solves the smell.
Is it normal for the heating element to have a slight coating even after cleaning? A very light film can remain since the element is not fully submersible. As long as it is not thick, sticky buildup, this is normal and safe.
What should I do if food keeps sticking to the basket? This is usually a sign of leftover grease residue. A thorough soak followed by a gentle scrub should restore the nonstick surface.
Wrapping It Up
Keeping a combo fryer clean does not need to feel overwhelming. Break it into small, regular habits, and it becomes second nature quickly. A quick wipe after each use, a deeper clean once a week, and an occasional thorough scrub each month is really all it takes to keep your machine running smoothly, smelling fresh, and cooking food evenly for a long time.
Your fryer works hard every time you use it, so giving it a little care in return keeps it safe, efficient, and ready whenever your next craving for crispy fries or golden chicken strikes.

Mary is a home cooking enthusiast and kitchen appliance reviewer who loves helping people find the best tools for everyday meals. She enjoys testing air fryers, deep fryers, and other cooking appliances while sharing honest reviews and practical buying advice. Through FryerPick.com, Mary provides expert guides, product comparisons, and cooking tips to help readers choose the right fryer for their kitchen.