How Often Should You Clean an Air Fryer?
If you’ve just bought an air fryer or you’ve had one sitting in your kitchen for a while, you might be asking yourself one simple question: how often do I actually need to clean this thing? The truth is, keeping your air fryer clean is one of the easiest ways to make it last longer, keep your food tasting better, and avoid any potential issues down the road.
Let me break down everything you need to know about air fryer maintenance and cleaning schedules so you can feel confident using your machine.
In this article
The Simple Answer: Clean Your Air Fryer After Every Use
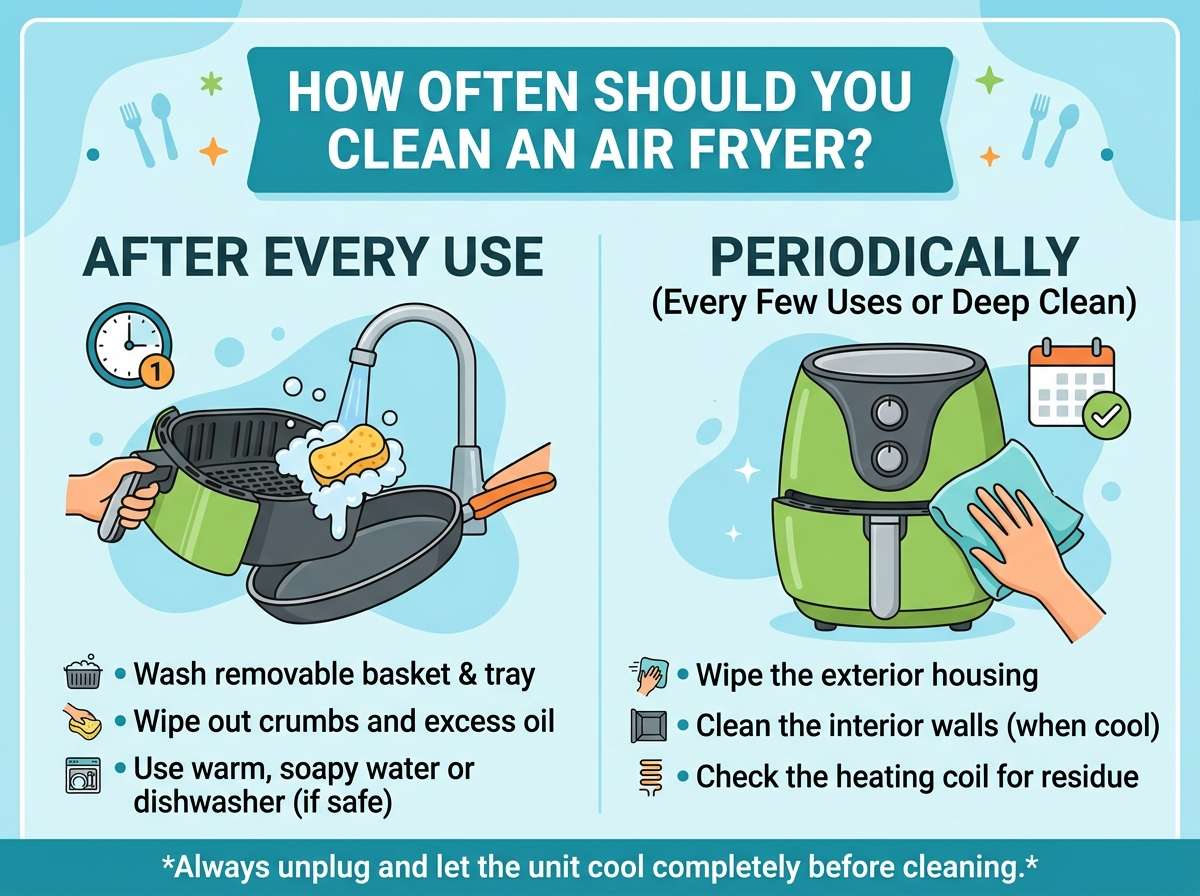
Here’s the straightforward truth: you should clean your air fryer basket and tray after every single time you use it. Yes, every time. I know that might sound like a lot, but hear me out.
When you cook with an air fryer, hot oil and grease splatter inside the machine. Food bits stick to the surfaces. If you leave these things sitting there, they start to break down and create a sticky, burnt-on mess that becomes ten times harder to clean later. It’s the same reason you wouldn’t leave a dirty frying pan on the stove for days.
The good news? Cleaning your air fryer after each use only takes about five minutes. It’s fast, it’s simple, and it saves you from dealing with a disaster when you try to use it again next time.
The Different Parts You Need to Clean
Your air fryer has several parts that all need attention. Let’s talk about each one so you know what you’re dealing with.
The Basket and Tray
These are the main parts that touch your food, so they’re your top priority. The basket is where your food sits, and the tray below it catches oil and grease drippings. Both of these need to come out after every single use.
Many modern air fryer baskets are nonstick, which means you can wash them with warm water, soap, and a soft sponge. Avoid using rough scouring pads or hard brushes because you can damage that nonstick coating. A soft cloth or gentle sponge works perfectly.
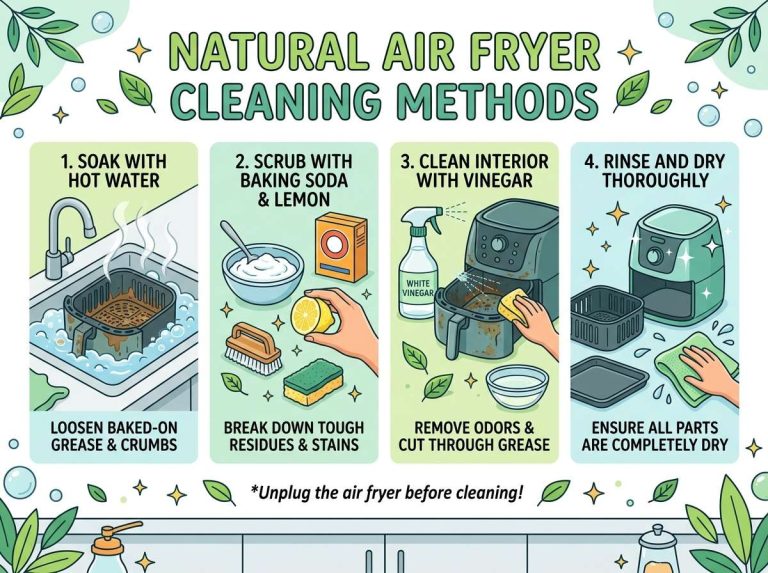
If you have stubborn stuck-on food, let the basket soak in warm soapy water for about ten to fifteen minutes. This softens up the mess, and then it wipes away easily. You don’t need heavy scrubbing.
The tray below the basket catches all the grease. This should also be rinsed and wiped clean after every use. Again, warm soapy water and a soft cloth do the job.
The Heating Element
The heating element sits at the top of your air fryer, and it does the actual cooking work. You don’t need to scrub it down after every use, but you do need to keep an eye on it.
If you notice grease buildup on the heating element, you can gently wipe it with a damp cloth once it cools completely. Be gentle here because you don’t want to damage the heating element itself. Some people use a thin brush to dust away debris, which works great too.
The Exterior and Vents
The outside of your air fryer can collect dust and grease splatter over time. Wipe down the exterior with a damp cloth every week or so. Make sure the air vents stay clear because the machine needs air circulation to work properly. A clogged vent means your air fryer can’t cook as well.
Deep Cleaning: Do It Every Two Weeks
Beyond the quick daily cleaning, your air fryer deserves a deeper clean every two weeks. This is when you really get in there and make sure everything is spotless.
For deep cleaning, you’ll want to:
Remove all the removable parts and soak them in hot soapy water for about fifteen to twenty minutes. This breaks down stubborn grease and makes everything easier to clean.
Use a soft brush or cloth to gently clean every surface inside the cooking chamber. Pay special attention to corners and crevices where grease likes to hide.
Wipe down the interior walls with a damp cloth. You might find some buildup inside the machine itself, especially if you cook greasy foods often.
Check the heating element again and make sure nothing is blocking it.
Dry all the parts completely before putting them back in the machine. Water left behind can create rust over time, even though most air fryers have stainless steel or coated interiors.
Cleaning When You Cook Greasy Foods
If you’re the type of person who cooks a lot of fried chicken, bacon, or other fatty foods in your air fryer, you might need to clean more often. Greasy foods create more splatter and buildup than lean proteins or vegetables.
When you cook something particularly oily, do a quick inspection after it finishes cooking. If you see grease splatter on the interior walls or heating element, wipe it down right away while the machine is still slightly warm. This is much easier than letting it dry and stick on there.
You might also want to do a deep clean every ten days instead of every two weeks if you’re regularly cooking high-fat foods. This keeps your machine running smoothly and prevents grease from building up over time.
Weekly Maintenance Tasks
Once a week, take time to do some basic maintenance beyond the daily cleaning. These tasks only take a few minutes but make a big difference in how your air fryer performs.
Check the basket for any wear and tear. If the nonstick coating starts peeling or cracking, it’s time to think about replacing it. A damaged basket won’t cook as evenly, and you might start getting rust spots.
Look inside the cooking chamber for any debris or grease buildup. Wipe down any spots you see.
Make sure all the vents are clear and dust-free. You can use a soft brush or even a cloth to gently clear out any dust.
Run your fingers around the seams and joints to feel for any sticky spots. Grease sometimes hides in these places, and you want to clean it out.
Monthly Deep Cleaning Sessions
Once a month, do a really thorough cleaning. This is the time to pull out your air fryer and give it the spa treatment.
For monthly cleaning:
Soak all removable parts in hot soapy water for twenty to thirty minutes. This breaks down all the buildup from the past month.
Use a soft brush to clean every surface, paying attention to areas where grease accumulates.
Wipe the heating element gently with a damp cloth. You can use a thin brush to clear away any burnt-on bits.
Clean the interior chamber thoroughly, getting into corners and crevices.
Let everything dry completely before reassembling.
This monthly deep clean keeps your air fryer performing like it’s brand new and helps catch any issues before they become problems.
Common Mistakes People Make When Cleaning Air Fryers
Let me share some mistakes I see people make all the time. Avoid these, and your air fryer will thank you.
Using Harsh Chemicals
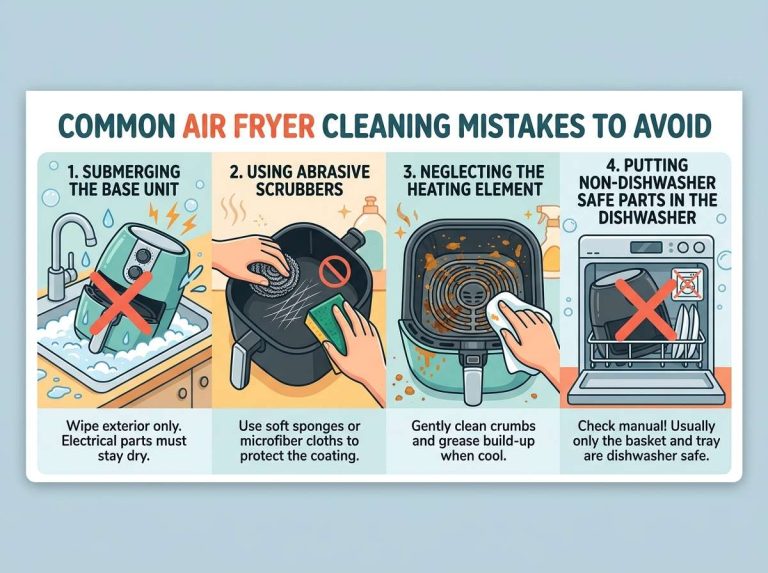
Your air fryer is not a bathroom fixture. You don’t need bleach or heavy chemical cleaners. Warm water and mild dish soap do the job perfectly. Harsh chemicals can damage the nonstick coating and leave residue that might end up in your food.
Scrubbing Too Hard
This is probably the biggest mistake. People see stubborn stuck-on food and immediately start scrubbing with rough pads. This scratches up the nonstick coating and ruins the basket. A soft sponge and some soaking time work so much better.
Putting Everything in the Dishwasher
Some air fryer baskets say they’re dishwasher safe, but I recommend hand washing whenever possible. The dishwasher’s intense heat and spray can damage the nonstick coating faster than hand washing. It might seem easier, but it shortens the life of your basket.
Ignoring the Heating Element
People often forget about the heating element because it’s harder to see. But grease buildup on the heating element reduces cooking performance and can even create smoke. Check it regularly and wipe it down gently when needed.
Not Drying Properly
Leaving water sitting inside your air fryer is asking for rust and mold problems. Always make sure everything is completely dry before putting the machine back together.
What Happens If You Don’t Clean Your Air Fryer Regularly
I want to paint a picture of what happens when people skip regular cleaning, because it’s not pretty.
Grease builds up on the heating element. The element gets surrounded by burnt grease, which makes it work harder to cook your food. Your meals start cooking unevenly or taking longer than they should.
Food particles trapped in the basket and crevices start to break down and rot. This creates a foul smell that lingers in your kitchen and can even affect the taste of your food.
The nonstick coating gets damaged from stuck-on food and rough scrubbing. Soon your food starts sticking to the basket, and you’re frustrated because it seems like your air fryer is broken.
Mold and bacteria can grow in areas with trapped moisture and food debris. This is a real health hazard that nobody wants.
The heating element or other internal parts might fail early because they’re working too hard fighting against grease buildup. You end up replacing your air fryer years before you should have to.
None of this happens if you just spend five minutes cleaning after each use. It’s really that simple.
Products That Make Air Fryer Cleaning Easier
While you don’t need fancy products to clean your air fryer, a few things can make the job easier.
A soft silicone brush works great for gently scrubbing without damaging the nonstick coating. Look for one specifically designed for nonstick cookware.
Parchment paper liners fit inside your air fryer basket and catch grease and food debris. You simply throw them away after cooking, and your basket stays much cleaner. Just make sure the parchment paper doesn’t touch the heating element.
A microfiber cloth is perfect for drying and polishing without leaving lint or streaks.
Some people swear by a paste made from baking soda and water for stubborn stuck-on food. This is gentle, natural, and actually works pretty well.
Paper towels work fine for quick wipe-downs after cooking.
Special Tips for Specific Air Fryer Models
Different air fryer models sometimes have their own quirks and special cleaning needs. Here are some general tips that work across most models.
If your air fryer has a removable heating element, check your manual to see if you can take it out for easier cleaning. Not all models allow this, but if yours does, taking it out once a month for cleaning keeps it performing better.
For air fryer ovens with multiple shelves, clean each shelf separately and make sure grease doesn’t build up between the shelves.
If you have a large commercial-style air fryer, the maintenance is basically the same, but you might need to clean more often because you’re using it more frequently.
Storage and Seasonal Cleaning
If you’re storing your air fryer for the off-season or if you know you won’t use it for a while, do a thorough cleaning first. Clean out all the grease and food debris, make sure everything is dry, and store it in a cool, dry place. This prevents mold and keeps everything fresh for when you use it again.
When you pull it out after a storage period, do another quick clean and a test run before cooking actual food. This makes sure everything still works properly.
The Real Cost of Not Maintaining Your Air Fryer
Think about how much you spent on your air fryer. Whether it was a budget model for under a hundred dollars or a premium machine for several hundred, you made an investment. Regular cleaning is basically free maintenance that keeps that investment working well.
Air fryer repair or replacement costs hundreds of dollars. Spending five minutes cleaning after each use and doing a deep clean every two weeks is basically free insurance against expensive repairs down the road.
Your food also tastes better when your air fryer is clean. A well-maintained machine cooks more evenly, heats more efficiently, and doesn’t have stale grease affecting the flavor of your meals.
Quick Reference Cleaning Schedule
Here’s a simple schedule you can follow:
After Every Use: Clean the basket and tray with warm soapy water and a soft cloth or sponge. Wipe down the interior if you see any grease splatter. Takes about five minutes.
Once a Week: Check the basket for damage. Inspect the heating element. Wipe down exterior and vents. Make sure everything is dust-free and clean.
Every Two Weeks: Deep clean all removable parts by soaking and scrubbing gently. Clean the interior thoroughly. Dry everything completely.
Once a Month: Do a really thorough deep clean, including the heating element if it needs attention. Check everything for wear and tear.
As Needed: If you cook especially greasy foods, do a quick cleaning after cooking and maybe speed up your deep clean schedule to every ten days.
Final Thoughts
Cleaning your air fryer doesn’t have to feel like a chore. It takes just a few minutes after each use, and it keeps your machine working like new. You’ll notice your food cooks better, smells fresher, and tastes cleaner when you keep up with regular maintenance.
Think of it the same way you maintain any kitchen tool. You wash your cutting board after use. You wipe down your stove. You clean your pans. Your air fryer deserves the same basic care, and honestly, it’s even easier to maintain than most other kitchen equipment.
Start with the simple habit of cleaning after every use, do a deeper clean every two weeks, and you’ll have an air fryer that lasts for years and performs perfectly every single time you use it. Your future self, and your taste buds, will thank you.
Remember, five minutes of cleaning after each use is so much better than spending thirty minutes scrubbing a months-old buildup, or worse, having to buy a new air fryer because the old one stopped working. Keep it clean, keep it simple, and enjoy your air fryer for many meals to come.

Mary is a home cooking enthusiast and kitchen appliance reviewer who loves helping people find the best tools for everyday meals. She enjoys testing air fryers, deep fryers, and other cooking appliances while sharing honest reviews and practical buying advice. Through FryerPick.com, Mary provides expert guides, product comparisons, and cooking tips to help readers choose the right fryer for their kitchen.