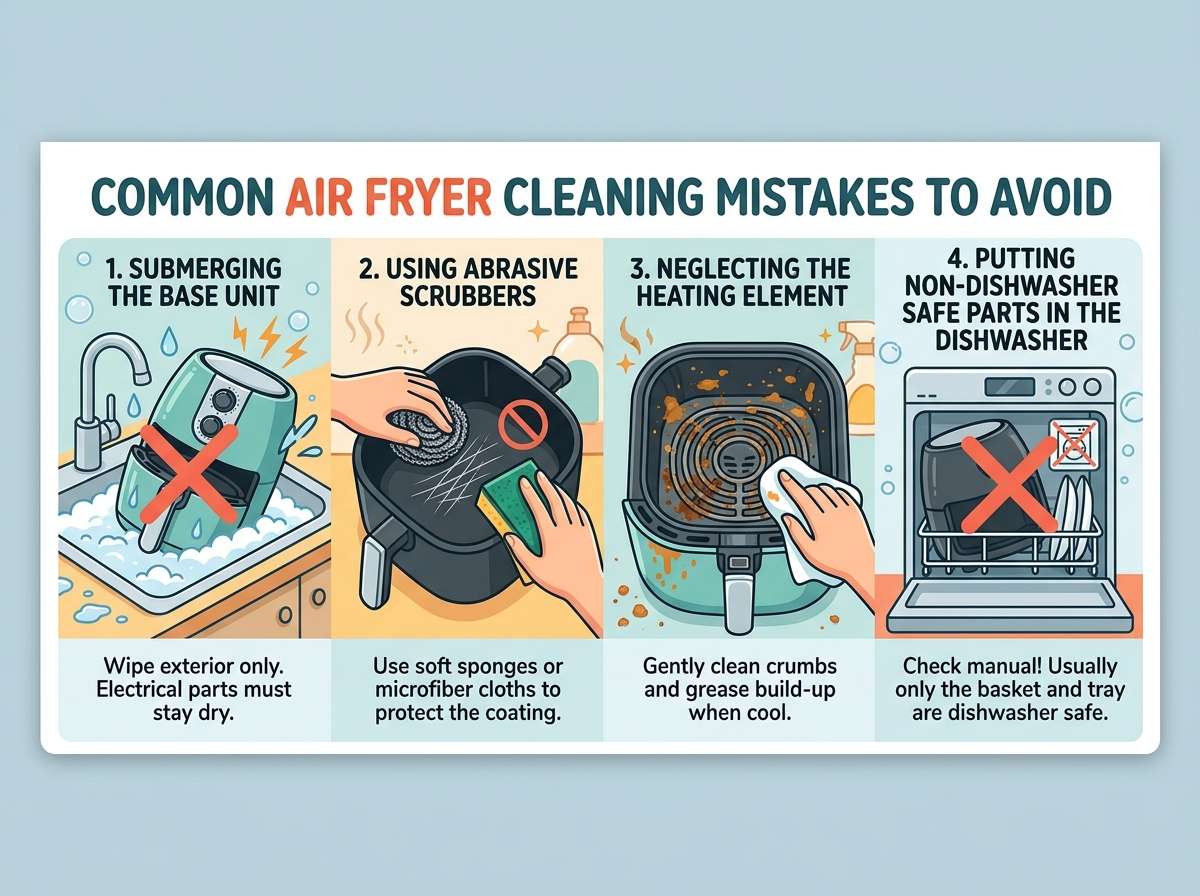
Air Fryer Cleaning Mistakes
An air fryer feels like magic in the kitchen. It gives you crispy fries, juicy chicken wings, and roasted veggies without all that oil. But here’s the thing: this handy gadget only stays magic if you take care of it the right way. A lot of people love their air fryer for the first few months, then wonder why it starts smelling weird, cooking unevenly, or losing that crisp touch it used to have.
The answer is almost always the same. Bad cleaning habits are quietly wrecking the appliance. Small mistakes pile up over time, and before you know it, your air fryer basket is sticky, the heating element is coated in grease, and your food tastes like last week’s dinner.
In this guide, we’ll walk through the most common cleaning mistakes people make with their air fryers, why these mistakes cause real damage, and simple fixes that keep your machine running like new for years. Grab a cup of tea and let’s get into it.
In this article
Why Cleaning Your Air Fryer Actually Matters
Before we jump into the mistakes, let’s talk about why this even matters so much. An air fryer works by blowing hot air around your food at high speed. That fan and heating coil are doing a lot of work every single time you cook. Grease, crumbs, and food bits get flung around inside the machine with every use.
If that leftover gunk builds up, a few bad things start happening:
- Your food starts tasting like smoke or old oil
- The machine can start smoking during cooking
- Heat doesn’t move around evenly, so your food turns out soggy in spots
- Bacteria can grow on food residue, which is a health risk
- The motor and heating parts can wear out faster than they should
So cleaning isn’t just about looks. It’s about keeping your air fryer safe, efficient, and tasty for as long as possible. Now let’s get into the mistakes that most people don’t even realize they’re making.
Mistake 1: Skipping Cleaning After Every Use
This is probably the biggest mistake out there. Some people think a quick wipe every few days is good enough. It’s not. Grease and tiny food crumbs stick to the basket and tray after just one cooking session, and if you leave them there, they harden and become way tougher to remove later.
Think of it like leaving dishes in the sink overnight. The longer food sits, the harder it gets to clean. Air fryer parts work the same way, except now that stuck-on grease is baking onto metal or non-stick coating every time you turn the machine back on.
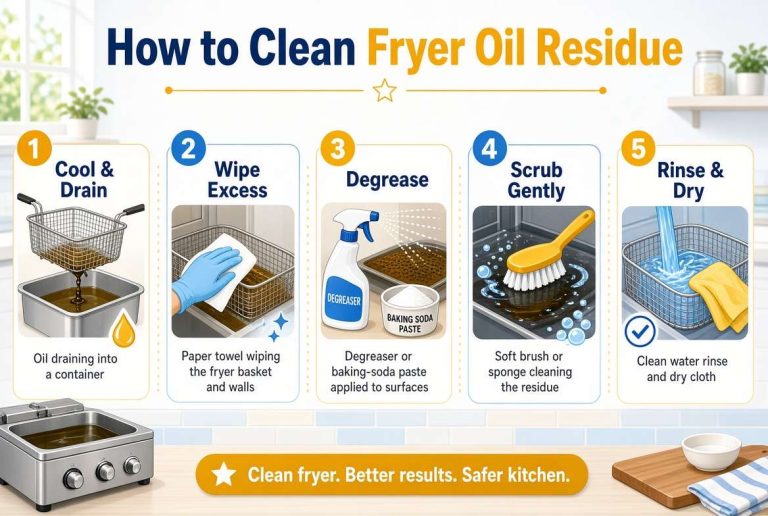
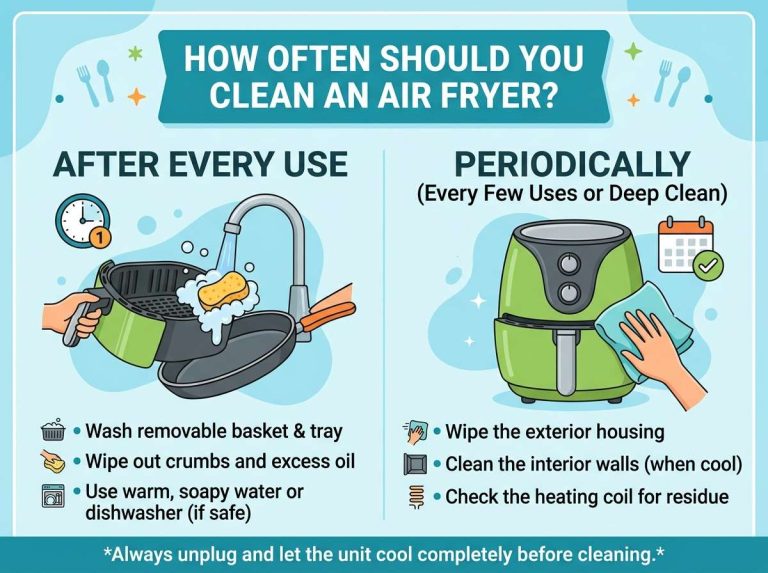
The fix: Clean the basket, tray, and pan after every single use. It doesn’t need to be a deep scrub every time. A quick wash with warm soapy water right after cooking takes less than five minutes and saves you from a much bigger mess down the road.
Mistake 2: Using Metal Utensils or Rough Scrubbers
Almost every air fryer basket has a non-stick coating. That coating is what keeps your fries from sticking and makes cleanup easy in the first place. But metal forks, spatulas, and steel wool scrubbers scratch that coating right off.
Once the coating is damaged, food sticks even more than before, and tiny flakes of that coating can end up in your food. Nobody wants that on their plate.
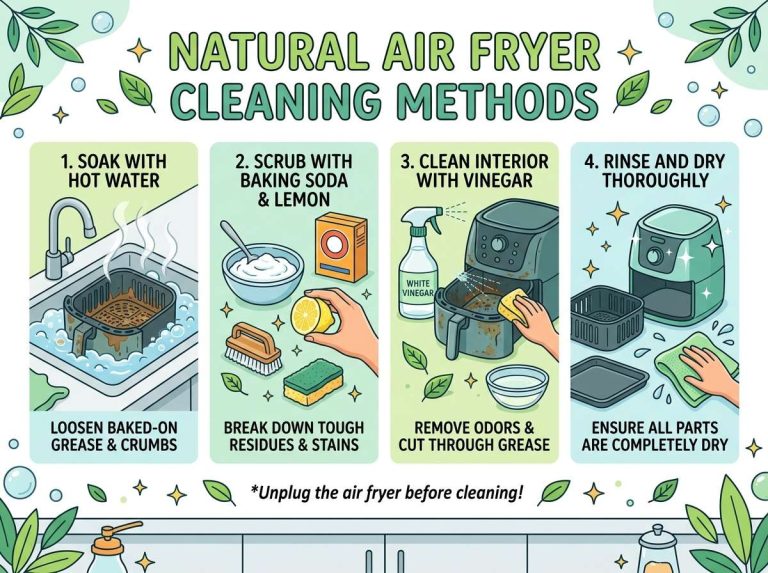
The fix: Stick to soft sponges, silicone tools, and gentle brushes. If something is really stuck on, soak the basket in warm water for fifteen to twenty minutes first. This loosens grime without you needing to attack it with anything sharp or abrasive.
Mistake 3: Tossing the Basket Straight Into the Dishwasher
Some air fryer baskets are labeled dishwasher safe, and that’s fine to use if your manual actually says so. But a lot of folks assume every part is dishwasher safe without checking, and that assumption can be costly.
Harsh dishwasher detergent, high heat, and strong water jets can wear down non-stick coatings faster than hand washing. Over time, this leads to peeling, chipping, and a basket that just isn’t as effective anymore.
The fix: Always check your air fryer’s manual first. If it doesn’t confirm the parts are dishwasher safe, wash them by hand with mild dish soap and warm water instead. It takes a little more effort, but it protects the coating and extends the life of the basket.
Mistake 4: Forgetting to Clean the Heating Coil
Here’s a spot most people completely ignore. The heating coil sits at the top of the air fryer, and grease splatters up onto it during cooking. Over weeks and months, this grease turns into a dark, sticky layer that can actually start smoking the next time you cook.
If you’ve ever noticed a burning smell coming from your air fryer, this is often the exact reason why.
The fix: Unplug the machine and let it cool down completely first. Then use a soft brush or a damp cloth to gently wipe the coil. Avoid soaking it in water since this part has electrical components nearby. A little baking soda paste on a soft cloth can help lift tough grease without any scrubbing damage.
Mistake 5: Not Drying Parts Completely Before Reassembling
Washing your air fryer parts is only half the job. If you put them back together while they’re still damp, moisture gets trapped inside the machine. This creates the perfect setup for mold, mildew, and that musty smell that’s so hard to get rid of once it sets in.
Damp parts can also cause rust to form on certain metal components over time, especially in the tray and basket area.
The fix: Let every single piece air dry completely, or dry them with a clean towel, before putting the air fryer back together. This one extra step takes maybe two minutes but stops a whole list of problems before they start.
Mistake 6: Ignoring the Outside of the Machine
People tend to focus all their cleaning energy on the basket and tray, since that’s where the food touches. But grease and oil splatter everywhere during cooking, including the outer body, the control panel, and even the cord.
Over time, this leftover grease attracts dust and grime, making the whole appliance look grubby and feel sticky to the touch.
The fix: Wipe down the outside of the air fryer with a damp cloth after each use, or at least a few times a week. For the control panel, use a barely damp cloth so you don’t get moisture into the buttons or display screen.
Mistake 7: Using Harsh Chemicals or Bleach
It might feel like bleach or strong chemical cleaners would do a better job getting rid of grease and smells. In reality, these products can damage non-stick coatings and leave behind chemical residue that ends up in your food later.
Bleach fumes especially don’t belong anywhere near cooking equipment, since they can linger and transfer onto food during the next use.
The fix: Stick with gentle, food-safe cleaning options like warm soapy water, white vinegar, or baking soda paste. These natural options cut through grease just fine without leaving anything toxic behind.
Mistake 8: Not Cleaning the Air Vents
Every air fryer has vents that let hot air escape while it cooks. These vents can collect grease, dust, and small food particles over time, and a lot of people never think to check them.
Blocked vents mess with airflow, which means your food doesn’t cook evenly anymore. In some cases, blocked vents can even become a fire hazard if enough grease builds up.
The fix: Once a month, check the vents on the back or side of your air fryer. Use a soft brush, like an old toothbrush, to clear out any buildup. A cotton swab dipped in a bit of vinegar works great for tight corners too.
Mistake 9: Soaking the Entire Unit in Water
This sounds like an obvious one to avoid, but it happens more than you’d think, especially when someone is trying to get rid of a strong smell fast. The base of an air fryer houses the motor, wiring, and heating element, and none of that is meant to touch water.
Dunking or rinsing the main unit under a tap can cause serious electrical damage, and in the worst case, it can be a real safety hazard the next time you plug it in.
The fix: Only the removable parts, like the basket, tray, and pan, should ever touch water. For the main unit, always use a lightly damp cloth and keep water far away from any openings, vents, or the plug.
Mistake 10: Waiting Too Long to Deal With Smells
A weird smell coming from your air fryer is your first warning sign that something’s off inside. Some people just spray a bit of air freshener nearby and move on with their day. That’s a temporary fix that doesn’t touch the actual problem.
Lingering smells usually mean grease buildup somewhere you haven’t cleaned yet, maybe the coil, the vents, or a hidden corner of the basket.
The fix: Track down the smell instead of masking it. Run an empty cycle with a few slices of lemon and a splash of water in the basket for about ten minutes at a low temperature. This helps loosen grease and freshen things up naturally. Then follow up with a full clean of every removable part.
Mistake 11: Cleaning While the Machine Is Still Hot
It’s tempting to clean up right away so you don’t forget, but jumping straight in while the air fryer is still hot is risky. You could burn yourself, warp certain plastic parts, or cause a non-stick coating to react badly with cold water hitting a hot surface.
The fix: Give the machine at least twenty to thirty minutes to cool down fully before you start cleaning. Patience here protects both you and the appliance.
Mistake 12: Not Reading the Manual at All
Every air fryer brand and model is a little different. Some baskets can go in the dishwasher, some can’t. Some allow water near certain parts, others don’t. Skipping the manual means you’re basically guessing, and guessing wrong can shorten the life of your appliance fast.
The fix: Keep the manual somewhere handy, even if it’s just a saved PDF on your phone. It only takes a few minutes to check specific cleaning instructions, and it removes all the guesswork.
A Simple Weekly Cleaning Routine You Can Actually Stick To
Cleaning doesn’t need to be complicated. Here’s an easy routine that covers everything without eating up your whole afternoon:
After every cook:
- Let the unit cool down
- Wash the basket, tray, and pan with warm soapy water
- Dry everything fully before putting it back
Once a week:
- Wipe down the outside body and control panel
- Check and clean the air vents
- Wipe the heating coil gently with a damp cloth
Once a month:
- Deep clean with a vinegar and water soak for tougher grease
- Inspect the non-stick coating for any wear or scratches
- Check the power cord and plug for any damage
Sticking to a routine like this means you’re never facing a huge, overwhelming cleaning job. Little bits of regular care add up to a machine that keeps working well for a long time.
Natural Cleaning Ingredients That Actually Work
You don’t need fancy cleaning sprays to keep an air fryer spotless. A few kitchen staples do the job just as well, sometimes even better:
- Baking soda: Mix with a little water to form a paste. This lifts baked-on grease without scratching surfaces.
- White vinegar: Great for cutting through grease and neutralizing odors. Mix with warm water for a gentle all-purpose clean.
- Lemon: Cuts through grease naturally and leaves a fresh smell behind after a quick steam cycle.
- Dish soap: A basic, mild dish soap handles everyday grease without any harsh chemicals involved.
These simple ingredients keep your air fryer safe for food contact while still tackling tough grime.
Signs Your Air Fryer Needs a Deeper Clean
Sometimes regular wiping isn’t enough, and your machine is telling you it needs more attention. Watch out for these signs:
- Smoke coming out during cooking, even with a clean basket
- A burning smell that won’t go away
- Food coming out soggy or unevenly cooked
- Visible grease buildup on the coil or vents
- A greasy film on the outer body that won’t wipe off easily
If you notice any of these, it’s time to pause regular cooking and give the whole machine a proper deep clean before using it again.
Common Air Fryer Cleaning Questions
How often should I clean my air fryer basket? Ideally, clean the basket and tray after every cooking session. Grease hardens fast, and a quick rinse right after cooking is much easier than scraping off dried-on residue a few days later.
Can I use soap on my air fryer basket? Yes, a mild dish soap with warm water is perfectly safe and works well. Just avoid anything with bleach or strong chemical fragrances, since those can leave residue behind on a surface that touches food.
Why does my air fryer smell like burning even after I clean it? This usually points to grease hiding somewhere you haven’t reached yet, like the heating coil, the air vents, or a groove in the basket. Give those hidden spots a closer look and a gentle clean.
Is it normal for the non-stick coating to wear down over time? A little wear over the years is normal, especially with daily use. But scratches, peeling, or flaking usually mean metal utensils or rough scrubbers have been used. Switching to silicone tools slows this process down a lot.
Can vinegar damage my air fryer? No, a diluted vinegar and water mix is one of the safest natural cleaners you can use. It cuts grease well and doesn’t leave behind any harmful residue, unlike bleach or ammonia-based cleaners.
What should I do if water gets into the base of my air fryer by accident? Unplug the unit right away and let it dry out fully for at least twenty-four hours in a well-ventilated spot before plugging it back in. If you notice any sparking, strange smells, or the machine not turning on properly afterward, stop using it and reach out to the manufacturer.
Extra Tips to Keep Your Air Fryer in Top Shape
Beyond the basic cleaning steps, a few small habits can add years to your air fryer’s life:
- Line the basket with parchment paper made for air fryers during messy cooks, like anything with sauce or marinade. This cuts down on cleanup time significantly.
- Avoid overcrowding the basket. Packed food traps grease and steam, which leads to more splatter on the coil and inner walls.
- Store the air fryer with the basket slightly open rather than fully closed. This lets air circulate and stops trapped moisture from turning into mold or musty smells.
- Keep a dedicated cleaning brush just for the vents and coil area. Using the same brush for dishes can spread grease around instead of removing it.
- Check the rubber seal or gasket, if your model has one, for cracks or grease buildup every couple of weeks. A worn seal can affect how well the machine holds heat.
None of these tips take much time, but together, they make a real difference in how long your air fryer stays in great working condition.
Final Thoughts
Taking care of an air fryer really comes down to consistency more than anything else. A quick wipe after each use, a proper wash every few days, and a little extra attention to spots like the coil and vents will keep your appliance running smoothly for a long stretch of time.
Avoiding the mistakes above means fewer weird smells, better tasting food, and a machine that actually lasts instead of dying out after a short while. It’s a small habit that pays off every single time you cook.
So next time you pull out those crispy fries or perfectly roasted veggies, take those extra few minutes afterward to clean up properly. Your air fryer will thank you, and honestly, so will your taste buds.

Mary is a home cooking enthusiast and kitchen appliance reviewer who loves helping people find the best tools for everyday meals. She enjoys testing air fryers, deep fryers, and other cooking appliances while sharing honest reviews and practical buying advice. Through FryerPick.com, Mary provides expert guides, product comparisons, and cooking tips to help readers choose the right fryer for their kitchen.