How To Cook A Chicken In A Ninja Air Fryer
Cooking chicken in a Ninja air fryer is one of the easiest ways to make a hot, juicy meal on a weeknight. The appliance works like a small, fast convection oven. It moves hot air around the food, so the outside turns golden and the inside cooks through. If you are new to this kitchen gadget, this guide will walk you through each step.
You will learn how to pick the right cut, prepare the meat, set the temperature and time, and check that the chicken is safe to eat. You will also find simple recipe ideas, common problems and fixes, and easy cleaning tips. By the end, you will feel ready to cook chicken with confidence.
Key Takeaways
- Preheat your Ninja air fryer for a few minutes before adding chicken for more even results.
- Always cook chicken to an internal temperature of 165°F (74°C) and check it with a meat thermometer.
- Pat the chicken dry, use a little oil, and leave space between pieces for crispy skin.
- Flip or shake the food halfway through cooking so all sides brown evenly.
- Let the chicken rest for a few minutes after cooking so the juices settle.
Introduction
This article explains how to cook a chicken in a Ninja air fryer from start to finish. It is written for beginners who have never used one before. Each section builds on the one before it.
Along the way, you will see simple tips and clear examples. Nothing here requires special skills or expensive ingredients.
Why Use a Ninja Air Fryer for Chicken?
Many home cooks choose an air fryer because it is quick and easy to use. It heats up fast and needs less oil than deep frying. It also takes up less space than a full-size oven.
Chicken is a popular choice for air frying because it cooks well with this method. The meat stays moist, and the outside can turn crisp and golden.
How Air Frying Cooks Chicken
An air fryer uses a heating element and a fan. The fan pushes hot air quickly over and around the food. This process is called convection cooking.
Because the air moves fast, heat reaches the surface of the chicken quickly. The skin or coating browns, while the inside cooks through. Think of it as a small, powerful oven that circulates heat.
Benefits of Air Frying Compared to Oven Roasting
Air frying often takes less time than a conventional oven because the appliance is small and heats quickly. It also tends to use less energy when cooking small batches. Cleanup is usually simpler, since the basket is compact.
Oven roasting, on the other hand, works well for a large whole bird or a big tray of pieces. An oven has more room and can hold more food at once. Both methods can produce tasty chicken, so the best choice depends on how much food you are cooking.
Ninja Air Fryer Basics for Beginners
Before you cook, it helps to know the main parts of your appliance. Ninja makes several models, and layouts can differ. Your user manual will give the exact details for your model.
Main Parts and Controls
Most Ninja air fryers have a cooking basket or pot, a removable crisper plate or tray, and a control panel. The control panel usually has buttons for cooking function, temperature and time. Some models also include a display screen and preset programs.
Look for a function labeled for air fry or chicken. Presets can be helpful, but you can also set the temperature and time by hand. Learn the controls once, and the rest becomes much easier.
Preheating Your Ninja Air Fryer
Preheating means running the appliance for a short time before adding food. It helps the chamber reach the set temperature. Many recipes call for preheating, and it often gives more even browning.
Check your manual for the recommended preheat time for your model. Some models have an Some models have an automatic preheat setting, while others need you to start the cycle by hand. Either way, the appliance will usually signal when it is ready. Add the chicken once it has finished preheating.
Cooking Basket Versus Crisper Plate Options
Ninja air fryers may come with either a cooking basket or a crisper plate, and some include both. A basket has tall sides and holds food in a deeper container. A crisper plate is flatter and lets more air reach the underside of the food.
For chicken pieces, a basket works well for wings and tenders that you shake during cooking. A crisper plate suits thicker pieces such as breasts and thighs, where you want the bottom to brown too. Check your manual to see which accessories came with your model.
Preparing Chicken for the Air Fryer
Good results start before the chicken goes into the basket. Picking the right cut and preparing it well makes a noticeable difference. These steps are simple and take only a few minutes.
Picking Chicken Cuts: Breasts, Thighs, Drumsticks and Wings
Chicken breasts are lean and cook fairly quickly. They can dry out if cooked too long, so watch them closely. Boneless breasts are the most common choice for beginners.
Thighs and drumsticks have more fat and stay juicy more easily. Bone-in pieces take longer to cook than boneless ones. Wings are small and work well for quick, crispy snacks or appetizers.
Thawing Frozen Chicken Safely
For the best results, thaw chicken in the refrigerator before cooking. This keeps the meat at a safe temperature while it softens. Plan ahead, since thawing can take many hours.
You can cook some frozen chicken directly in the air fryer, but the cooking time will be longer. Always check the internal temperature to make sure the center is fully cooked. Never leave raw chicken on the counter to thaw.
Seasoning, Marinating and Oil Basics
Seasoning adds flavor to the outside of the chicken. Salt, black pepper, garlic powder, paprika and dried herbs are easy choices for beginners. Rub them over the surface before cooking.
A marinade is a seasoned liquid that soaks into the meat for a period of time. Marinating can make chicken more flavorful and tender. Keep marinated chicken in the refrigerator while it soaks.
A small amount of oil helps the skin brown and keeps the surface from drying out. Use a light oil that can handle heat, such as canola or avocado oil. Brush it on lightly rather than pouring it.
Patting Dry and Spacing Pieces
Pat the chicken dry with paper towels before seasoning. Excess moisture slows browning and can make the skin soggy. A dry surface crisps better.
Arrange the pieces in a single layer with space between them. Crowded food steams instead of browns. If you have a lot of chicken, cook it in batches.
Step-by-Step: How to Cook Chicken in a Ninja Air Fryer
Once your chicken is prepared, the cooking process is straightforward. Follow these steps in order. Adjust the times based on the cut and size of your chicken.
Setting Temperature and Time
Set the air fryer to the temperature suggested in your recipe or user manual. Many chicken recipes use a moderate to high setting. Set a timer for the first part of cooking.
Because every model and every piece of chicken is different, start with a time at the lower end of the range. You can always add a few more minutes. Checking early helps you avoid overcooking.
Flipping and Shaking Halfway Through
About halfway through the cooking time, pause the appliance. Flip larger pieces or shake the basket to turn smaller pieces such as wings. This helps every side brown evenly.
Be careful when you open the drawer or basket, since hot air and steam will escape. Use tongs to handle the chicken. Close the drawer again and resume cooking.
Checking Doneness with a Meat Thermometer
The most re reliable way to know chicken is safe is to use a food thermometer. Insert the probe into the thickest part of the meat, away from bone. The chicken is safe to eat when it reaches an internal temperature of 165°F (74°C).
Color alone is not a reliable sign. Chicken can look golden on the outside and still be undercooked inside. A thermometer takes the guesswork out of the process.
Resting Chicken After Cooking
Let the chicken rest for a few minutes after it comes out of the air fryer. Resting allows the juices to settle back into the meat. This helps keep each bite moist.
Place the chicken on a clean plate or cutting board while it rests. Avoid covering it tightly, since trapped steam can soften crispy skin.
Cooking Times for Different Chicken Cuts
Cooking time depends on the cut, its size and thickness, and your specific model. The ranges below are general starting points. Always confirm doneness with a thermometer rather than relying on time alone.
Boneless Chicken Breast Cooking Times
Boneless breasts usually cook in a fairly short window. Thinner pieces finish sooner than thick ones. Start checking near the low end of the range you find in your recipe.
Pound very thick breasts to an even thickness if you can. This helps the center cook at the same pace as the edges. It also reduces the chance of dry spots.
Bone-In Chicken Thigh and Drumstick Cooking Times
Bone-in thighs and drumsticks take longer because the bone slows heat from reaching the center. They are also more forgiving, since the extra fat helps keep them juicy. Check the thickest part near the bone for the final temperature.
Chicken Wings and Tenders Cooking Times
Wings and tenders are small, so they cook more quickly than bone-in thighs. Shake the basket during cooking so the pieces brown on all sides. They are a good choice when you want a quick snack or appetizer.
Whole Chicken and Large Pieces
A whole chicken is usually too large for most air fryer baskets. Check the size of your basket before buying a bird. Large pieces need longer cooking and may need to be cooked in a larger appliance instead.
If you do cook a large piece, check the manual for size limits. Use a thermometer in several spots to confirm that the whole piece is cooked through.
Recipe Ideas for Beginners
Simple recipes are a good way to practice. Each idea below uses basic ingredients and a short list of steps. Adjust the seasoning to suit your taste.
Simple Seasoned Chicken Breast
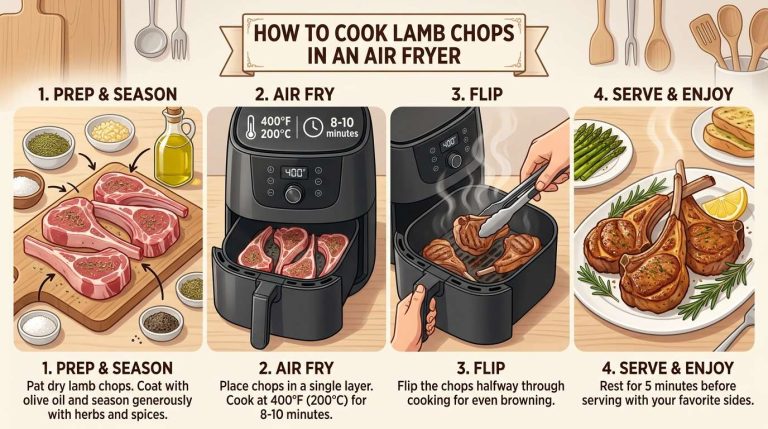
Pat boneless breasts dry and rub them with a little oil. Season both sides with salt, pepper and garlic powder. Cook until the center reaches 165°F (74°C), then rest before slicing.
Crispy Chicken Thighs
Season bone-in thighs with salt, paprika and a pinch of black pepper. Place them skin side up in a single layer. Flip once during cooking and check the temperature near the bone before serving.
Garlic Parmesan Chicken Wings
Toss dry wings with a little oil, salt and garlic powder. Cook in the basket, shaking halfway through. While they are still hot, toss them with grated Parmesan cheese for a savory coating.
Common Mistakes and Troubleshooting
Most problems have simple causes and easy fixes. Knowing what to look for can save a meal. Here are a few common issues and how to handle them.
Chicken Comes Out Dry
Dry chicken often comes from cooking too long or using a breast that was too thick. Use a thermometer and remove the chicken as soon as it reaches 165°F (74°C). Marinating or brushing with a little oil can also help keep it moist.
Skin Is Not Crispy
Soggy skin is usually caused by moisture or crowding. Pat the chicken dry and leave space between pieces. Preheating and a light coating of oil can also
Skin can also stay pale if the chicken is cooked at too low a temperature. Try raising the heat for the last few minutes. Keep a close eye on the color so it does not burn.
Chicken Is Undercooked in the Middle
Sometimes the outside browns before the center is done. This is common with thick pieces or bone-in cuts. Cut into the thickest part or use a thermometer to check.
If the center is not yet at 165°F (74°C), return the chicken to the basket for a few more minutes. Check again until the temperature is correct. Lower the heat slightly if the outside is browning too fast.
Smoke or Odor During Cooking
Some smoke can happen when fat drips onto the heating element or when food residue has built up. Dripping fat is common with fatty cuts such as thighs and wings. Cleaning the drawer and basket between uses helps reduce smoke.
If you notice a strong burning smell, pause the appliance and check for food stuck to the heating area. Unplug the appliance and let it cool before you clean it. Consult your manual if the problem continues.
Cleaning and Caring for Your Ninja Air Fryer After Cooking
Cleaning soon after cooking is easier than waiting until the grease hardens. Always unplug the appliance and let it cool before you clean it. Follow the instructions in your user manual for your model.
Safe Cleaning Steps for the Basket and Crisper Plate
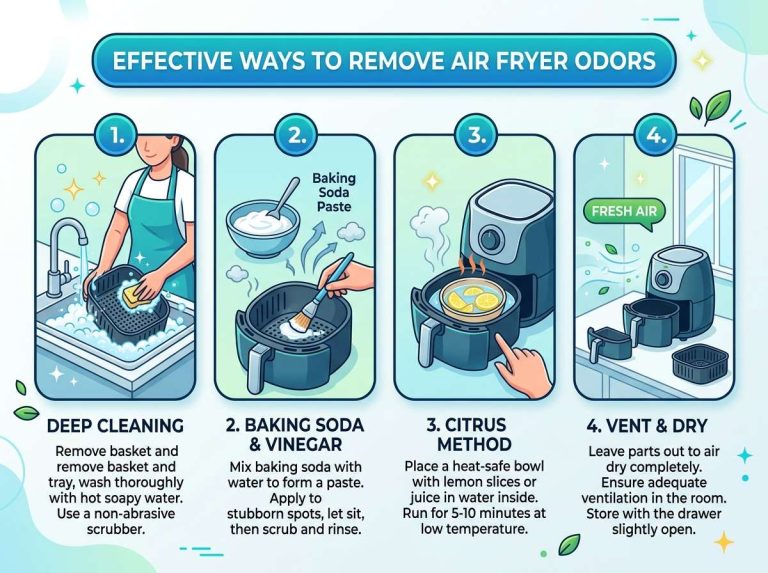
Remove the basket or crisper plate and wash it with warm, soapy water. Many parts are labeled as dishwasher safe, but check your manual first. Use a soft sponge rather than steel wool, which can scratch the nonstick surface.
Wipe the inside of the cooking chamber with a damp cloth once it is cool. Do not immerse the main unit in water. Dry all parts fully before you put them back.
Food Safety Tips for Raw Chicken
Raw chicken can carry germs that spread to other foods. Wash your hands after handling it. Clean any counters, cutting boards and utensils that touched raw meat.
Use a separate cutting board for raw chicken when you can. Do not put cooked chicken back on the plate that held it raw. Store leftovers in the refrigerator within a reasonable time after cooking.
Frequently Asked Questions
Do I need to preheat my Ninja air fryer before cooking chicken?
Preheating is not always required, but many recipes recommend it. It helps the chamber reach the set temperature before the chicken goes in. This can lead to more even browning and more consistent cooking.
What internal temperature should chicken reach in an air fryer?
Chicken should reach an internal temperature of 165°F (74°C) in the thickest part. Check with a food thermometer rather than relying on color alone. Insert the probe away from bone for an accurate reading.
Can I cook frozen chicken in a Ninja air fryer?
You can cook some frozen chicken in the air fryer, but it will take longer than fresh chicken. Make sure the center reaches 165°F (74°C) before eating. Thawing in the refrigerator first is usually the more reliable choice.
Do I need to add oil when air frying chicken?
A small amount of oil helps the skin brown and keeps the surface from drying out. Many chicken recipes call for a light brush of oil. You can use less or skip it if you prefer, though the skin may not crisp as well.
Can I cook chicken breasts and thighs together in the same batch?
Cooking different cuts together is not ideal, because they need different times to reach a safe temperature. Breasts usually finish sooner than bone-in thighs. It is better to cook them separately or add them at different times.
Conclusion
Cooking chicken in a Ninja air fryer is simple once you know the basics. Preheat the appliance, prepare the chicken with a little seasoning and oil, and leave space in the basket. Flip or shake during cooking, and always check that the internal temperature reaches 165°F (74°C).
Let the chicken rest before serving, and clean the basket and crisper plate once the appliance has cooled. With a few practice runs, you will find the timing and seasoning that suit your taste. Start with simple recipes, and build your confidence one meal at a time.

Mary is a home cooking enthusiast and kitchen appliance reviewer who loves helping people find the best tools for everyday meals. She enjoys testing air fryers, deep fryers, and other cooking appliances while sharing honest reviews and practical buying advice. Through FryerPick.com, Mary provides expert guides, product comparisons, and cooking tips to help readers choose the right fryer for their kitchen.