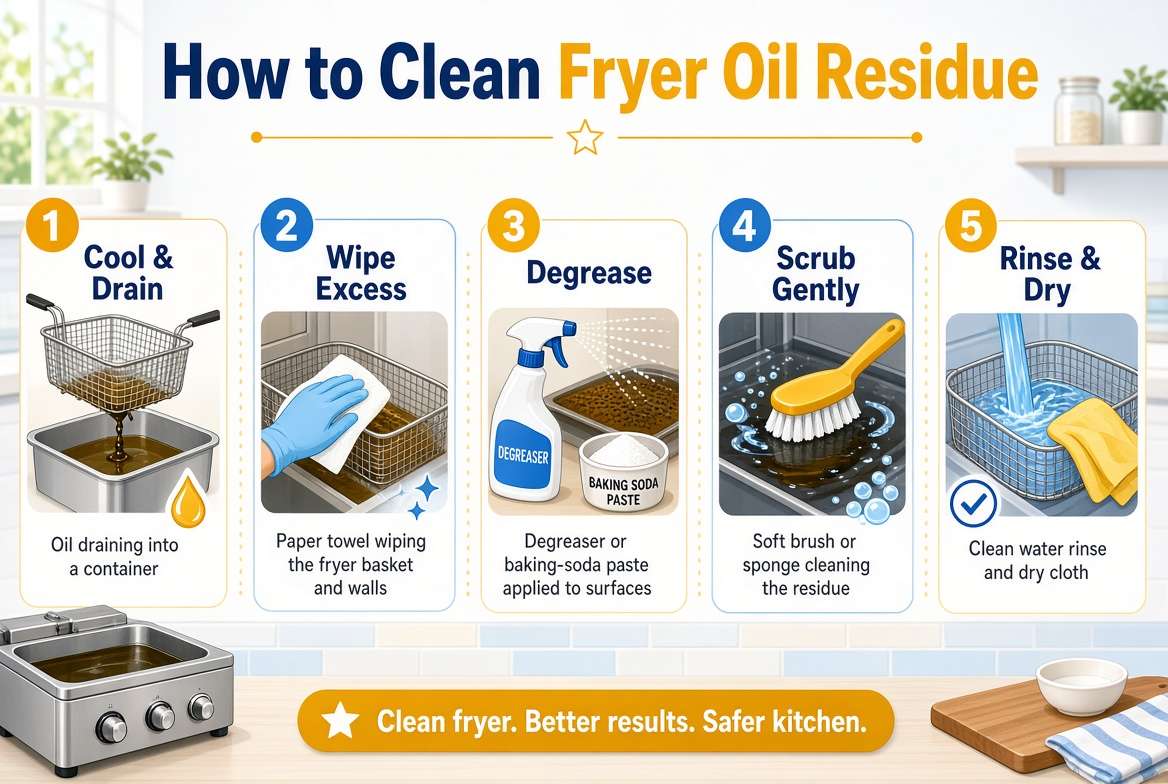
How to Clean Fryer Oil Residue?
Fryer oil residue is that sticky, brown, stubborn gunk that builds up inside your deep fryer. You see it on the walls, the basket, the heating element, and even the lid. It looks bad, it smells worse, and it can ruin the taste of your food.
The good news? You do not need fancy tools or harsh skills to remove it. You need a little time, some basic supplies, and the right order of steps.
In this guide, you will learn how to clean fryer oil residue from start to finish. We will cover home fryers, air fryers, and small commercial units. We will also share easy habits that keep the mess from coming back.
Let’s get started.
In this article
What Is Fryer Oil Residue, Anyway?
Every time you fry food, tiny bits of batter, crumbs, and food particles drop into the oil. Heat breaks those bits down. The oil itself also changes after many uses.
Over time, this mix turns into a thick, sticky layer. Cooks often call it carbonized oil, burnt grease, or polymerized oil. All three names point to the same problem: hard, dark buildup that clings to metal.
Here is what usually causes it:
- Old oil that stays in the fryer too long
- Food crumbs that never get filtered out
- Oil heated past its smoke point
- Skipping the regular wipe-down after cooking
- Leaving oil sitting in the fryer for days
Once the residue bakes onto the surface, a simple wipe will not fix it. That is why you need a real cleaning plan.
Why You Should Clean Fryer Oil Residue Often
Some people think a little buildup is no big deal. It is a big deal. Here is why.
Your food tastes better. Old residue gives fries, wings, and chicken a bitter, burnt flavor. A clean fryer gives you fresh, crisp results.
Your oil lasts longer. Dirty fryers break oil down faster. When you clean often, you spend less money on fresh oil.
Your fryer works better. Thick grease on the heating element makes it work harder. That can lead to uneven heat and a shorter life for the machine.
Your kitchen stays safer. Grease buildup can catch fire. It also makes smoke and bad smells. A clean fryer lowers those risks.
Your health gets a boost. Burnt oil residue can form unwanted compounds. Clean equipment helps you cook with fresher, better oil.
What You Need Before You Start
Gather your supplies first. This saves time and keeps you from running around with greasy hands.
Basic supplies:
- Dish soap (a grease-cutting kind works best)
- Baking soda
- White vinegar
- Warm or hot water
- Paper towels
- A soft sponge
- A non-scratch scrubber or nylon brush
- A plastic or silicone scraper
- Rubber gloves
- A large container for used oil
- A funnel
Optional helpers:
- A commercial fryer degreaser or boil-out cleaner
- A small soft brush for tight corners
- A microfiber cloth for drying
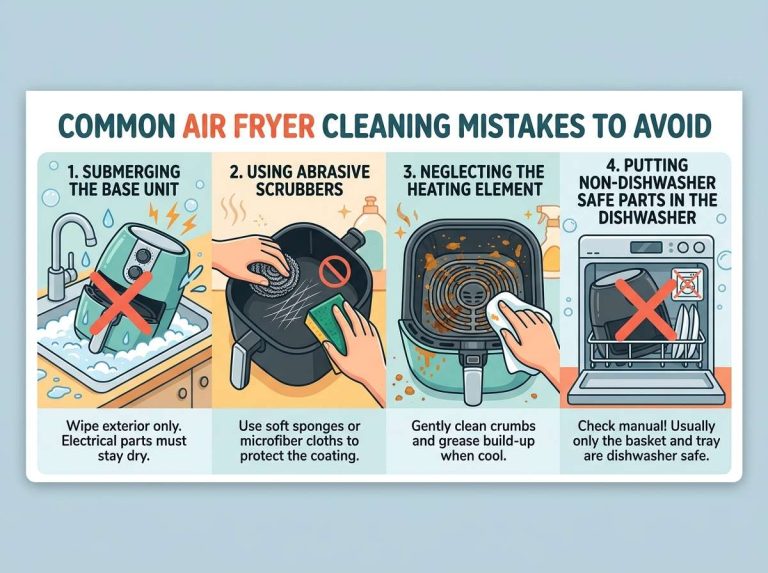
Skip steel wool and metal scrapers. They scratch the surface, and scratches trap more grease later.
Safety First: Do This Before Anything Else
Cleaning a fryer sounds easy, but hot oil can hurt you. Follow these rules every time.
- Unplug the fryer. Never clean a plugged-in machine.
- Let the oil cool down fully. This can take two to three hours. Do not rush it.
- Wear gloves. Greasy, hot water can burn your hands.
- Keep water away from hot oil. Water and hot oil mix badly and can spatter.
- Never pour old oil down the drain. It hardens and blocks pipes.
If you ever feel unsure, wait a little longer. Patience beats a burn.
Step 1: Drain and Store the Used Oil
First, deal with the oil itself. Cool oil is much easier and safer to handle.
If your fryer has a drain valve:
Place a large container under the valve. Open it slowly. Let the oil flow out into the container.
If your fryer has no drain valve:
Lift out the oil pot if it is removable. Pour the oil through a funnel into a container. If the pot is fixed, use a ladle or a small cup to scoop the oil out.
Filter the oil if you plan to reuse it.
Pour the oil through a fine mesh strainer or a coffee filter. This removes crumbs and food particles. Store it in a sealed, labeled container in a cool, dark place.
Throw it away if it looks bad.
Dark, foamy, thick, or smelly oil has done its job. Seal it in a container and take it to a local oil recycling spot, or toss it in the trash following your area’s rules.
Step 2: Wipe Out the Loose Grease
Now the fryer is empty, but a thick film still coats the inside. Do not add water yet.
Take a few paper towels and wipe the walls, the bottom, and the corners. This soaks up the loose grease. Use a plastic scraper to lift any soft chunks.
This step may feel boring, but it matters. If you skip it, you push all that grease into your cleaning water. That makes the next steps harder.
Keep wiping until the paper towels come away mostly clean.
Step 3: Remove the Baskets, Lid, and Parts
Take out everything that comes apart. This includes:
- The fry basket
- The lid and filter
- The oil pot (if removable)
- The splash guard
- Any trays or racks
Put these pieces in the sink. They need their own soak, and it is easier to clean them away from the main unit.
Check your user manual before you remove anything. Some parts are dishwasher safe, but many are not. When in doubt, wash by hand.
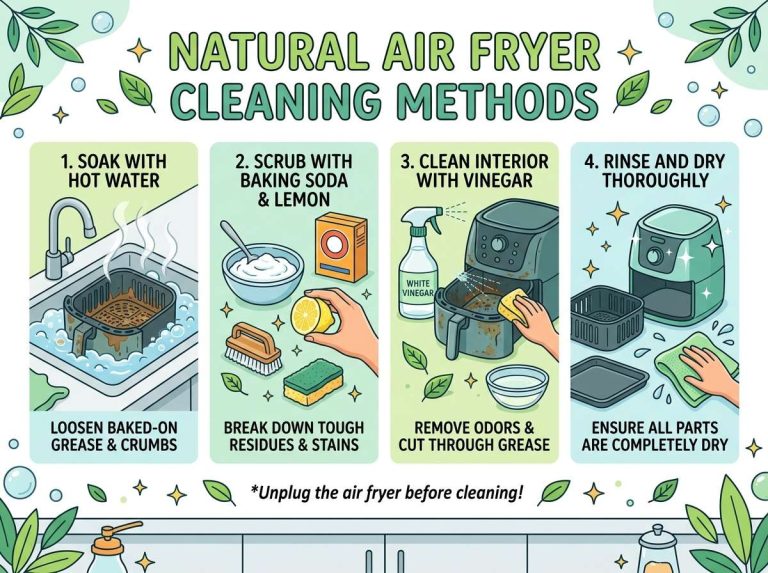
Step 4: Soak the Parts in Hot Soapy Water
Fill your sink with hot water. Add a good squeeze of dish soap. Drop the baskets and removable parts into the water.
Let them soak for 20 to 30 minutes. The hot soapy water loosens the grease so you can scrub it away with less effort.
After the soak, use a sponge or soft brush to scrub each part. Focus on the corners and the wire mesh of the basket. Rinse with hot water, then dry with a clean cloth.
For thick, baked-on residue, move on to the next trick.
Step 5: Use the Baking Soda Paste for Stubborn Residue
Baking soda is a cheap, powerful helper. It acts as a gentle scrub and helps break down grease.
Here is how to use it:
- Mix three tablespoons of baking soda with a little water.
- Stir until you get a thick paste.
- Spread the paste on the stained spots.
- Let it sit for 15 to 20 minutes.
- Scrub with a soft sponge or nylon brush.
- Wipe clean with a damp cloth.
You will see the brown gunk start to lift. For very thick buildup, repeat the process. Do not rush it with a metal scraper. A second round of paste works better and keeps the surface safe.
Step 6: Try the Vinegar Spray for Extra Shine
White vinegar cuts through grease and removes leftover smell. It also helps fight cloudy spots on stainless steel.
Fill a spray bottle with equal parts white vinegar and water. Spray the inside of the fryer and the removable parts. Let it sit for five to ten minutes.
Then wipe with a clean, damp cloth. The vinegar leaves the surface fresher and shinier.
Never mix vinegar and baking soda in a closed bottle. The fizz can build up pressure. Use them one after the other, not together in a sealed container.
Step 7: Do a Boil-Out for Heavy Buildup
If your fryer is really dirty, a boil-out gives the deepest clean. Restaurants use this method often, and you can do a home version too.
Here is how:
- Make sure the fryer is empty and the drain valve is closed.
- Fill the pot with water up to the oil line.
- Add a few squirts of dish soap, or a fryer boil-out cleaner (follow the label).
- Heat the water to a gentle simmer. Do not let it boil hard.
- Let it simmer for 15 to 30 minutes.
- Turn off the fryer and unplug it.
- Let the water cool down until it is safe to touch.
- Scrub the walls with a soft brush.
- Drain the water and rinse the pot well.
The heat and soap lift the baked-on residue off the metal. Be careful during this step. The water gets hot, and steam can burn you.
Not every home fryer can handle a boil-out. Check your manual first.
Step 8: Clean the Heating Element
The heating element is the part many people forget. Residue here changes how well your fryer heats.
If your fryer has a lift-up element, raise it and clean it with a soft sponge and warm soapy water. Do not soak parts that have electrical connections.
For built-in elements, use a damp cloth with a little baking soda paste. Wipe gently. Then wipe again with clean water.
Always let the element dry fully before you use the fryer again.
Step 9: Rinse and Dry Everything
Now rinse every part with clean, warm water. Soap left behind can spoil your next batch of oil, so rinse twice if you need to.
Dry all parts with a soft cloth or paper towels. Leave the lid off for an hour so the inside can air dry.
Any water left in the pot can spatter when you add oil. That can be dangerous. Make sure the fryer is bone dry before you refill it.
How to Clean an Air Fryer Oil Residue
Air fryers use little oil, but they still collect greasy buildup. The basket and drawer take most of the mess.
Quick method:
- Unplug the air fryer and let it cool.
- Remove the basket and drawer.
- Soak them in hot soapy water for 15 minutes.
- Scrub with a soft sponge.
- Wipe the inside of the main unit with a damp cloth.
- Clean the heating coil with a soft brush or a cloth dipped in warm soapy water.
- Dry everything before you put it back.
For sticky residue, use the baking soda paste. Let it sit, then scrub.
Do not use harsh scrubbers on the non-stick coating. They wear it down fast.
How to Clean a Commercial Fryer
Restaurants and food trucks need a stronger routine. Their fryers run for hours each day, so residue builds up quickly.
Daily tasks:
- Filter the oil at the end of each shift
- Wipe down the outside and the splash area
- Skim crumbs from the oil during use
Weekly tasks:
- Do a full boil-out using a commercial fryer cleaner
- Scrub the baskets and racks
- Clean the heating tubes and the drain valve
Always follow the cleaner’s label. Wear gloves and eye protection. Rinse the fryer well, because leftover cleaner can ruin fresh oil.
Easy Tips to Stop Residue From Coming Back
Cleaning feels better when you do it less often. These habits keep the mess small.
Filter your oil after every use. Straining out crumbs is the number one way to slow buildup.
Do not overheat the oil. Stay below the smoke point. Most frying works best between 325 and 375 degrees Fahrenheit.
Pat food dry before frying. Extra water makes oil break down faster and splatter more.
Skip heavy breading drop-offs. Shake off extra flour or batter before food hits the oil.
Replace old oil on time. If the oil looks dark, smells bad, or foams a lot, it is time to swap it.
Wipe the fryer after each use. A two-minute wipe prevents hours of scrubbing later.
Cover the fryer when it is not in use. This keeps dust and air from speeding up oil damage.
Best Oils for Less Residue
The oil you use also changes how much residue forms. Oils with a high smoke point handle heat better and leave less gunk.
Good options include:
- Peanut oil
- Canola oil
- Sunflower oil
- Refined vegetable oil
- Rice bran oil
Skip oils with a low smoke point, like unrefined olive oil, for deep frying. They burn quickly and leave behind sticky residue.
Common Mistakes to Avoid
Even careful people slip up. Watch out for these.
- Cleaning a hot fryer. This can burn you and damage the surface.
- Using metal scrubbers. They scratch the pot and trap grease.
- Pouring oil down the sink. This clogs pipes and harms the environment.
- Skipping the rinse. Soap leftovers spoil the taste of your food.
- Not drying the fryer. Water and hot oil are a risky mix.
- Ignoring the manual. Each fryer has its own rules.
Avoid these, and your cleaning will go smoothly.
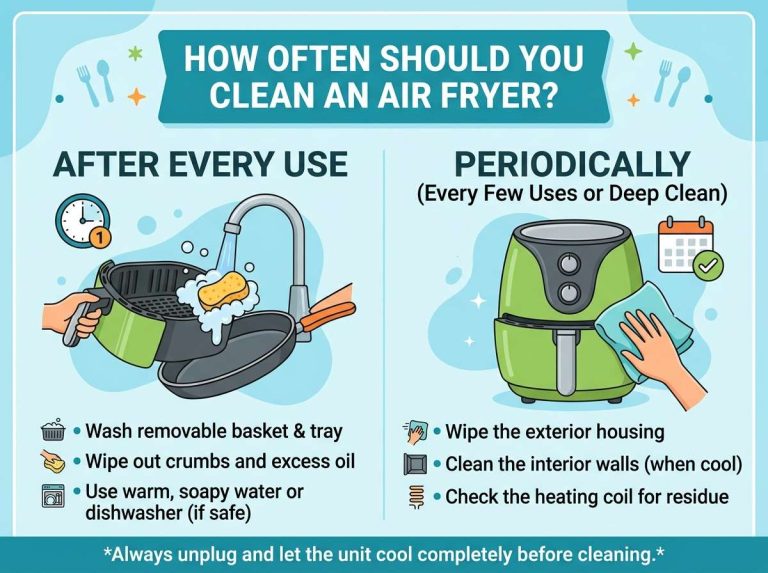
How Often Should You Clean Your Fryer?
The answer depends on how much you fry.
- Home fryer, used a few times a week: Wipe it after each use. Do a deep clean every couple of weeks, or after you change the oil.
- Home fryer, used once in a while: Deep clean after each oil change.
- Air fryer: Wash the basket after every use. Deep clean the inside every few weeks.
- Commercial fryer: Filter daily. Boil out weekly.
If you notice smoke, strange smells, or darker food, clean sooner.
How to Dispose of Used Fryer Oil the Right Way
Old oil needs a safe place to go. Here are simple options.
- Let it cool and seal it. Pour it into a leak-proof container, like an empty bottle with a tight cap.
- Use a recycling drop-off. Many cities and stores accept used cooking oil.
- Mix it with an absorbent. Soak it into cat litter or sawdust, then throw it in the trash.
- Try a local biofuel group. Some groups collect used oil and turn it into fuel.
Never pour it in the toilet, the sink, or the yard.
Quick Troubleshooting Guide
Problem: The residue will not budge. Soak the area with baking soda paste for longer, or run a boil-out.
Problem: The fryer still smells like old oil. Spray with a vinegar and water mix. Let it sit, then rinse well.
Problem: White spots show up after cleaning. These are often mineral marks from hard water. Wipe with a vinegar-water mix and dry with a soft cloth.
Problem: The basket has rust spots. Scrub gently with baking soda paste. If the rust is deep, replace the basket.
Problem: The heating element looks dull or crusty. Wipe with a damp cloth and baking soda. Dry fully before use.
Frequently Asked Questions
Can I use dish soap to clean fryer oil residue?
Yes. Dish soap breaks down grease well. For thick buildup, pair it with baking soda or a boil-out.
Is it safe to put fryer parts in the dishwasher?
Some parts are, but many are not. Check the manual first. Baskets with plastic handles often need hand washing.
What is the best homemade fryer cleaner?
A paste of baking soda and water works great for scrubbing. A spray of white vinegar and water works well for light grease and smells.
How do I remove burnt-on oil from a deep fryer?
Apply baking soda paste, let it sit, and scrub. If that fails, run a gentle boil-out with soap and water.
Can I reuse fryer oil after cleaning the fryer?
You can reuse oil if you filter it and it still looks and smells fine. Dark, thick, or foamy oil should go in the trash.
How long does fryer cleaning take?
A basic clean takes about 30 to 45 minutes, plus cooling time. A full boil-out takes about an hour or more.
Why does my fryer keep getting sticky?
Sticky buildup comes from old oil, high heat, and leftover crumbs. Filtering often and changing oil on time fixes most of it.
Final Thoughts
Cleaning fryer oil residue may feel like a chore, but it gets easy once you know the steps. Let the oil cool, drain it, wipe out the loose grease, and soak the parts. Then use baking soda, vinegar, or a boil-out to lift the stubborn gunk.
After that, rinse well and dry every piece. A clean fryer cooks better, lasts longer, and keeps your food tasting fresh.
Build small habits, like filtering the oil and wiping the fryer after each use. These tiny steps save you from big cleaning sessions later.
Now grab your gloves, gather your supplies, and give your fryer the fresh start it deserves. Your fries, wings, and snacks will thank you.

Mary is a home cooking enthusiast and kitchen appliance reviewer who loves helping people find the best tools for everyday meals. She enjoys testing air fryers, deep fryers, and other cooking appliances while sharing honest reviews and practical buying advice. Through FryerPick.com, Mary provides expert guides, product comparisons, and cooking tips to help readers choose the right fryer for their kitchen.