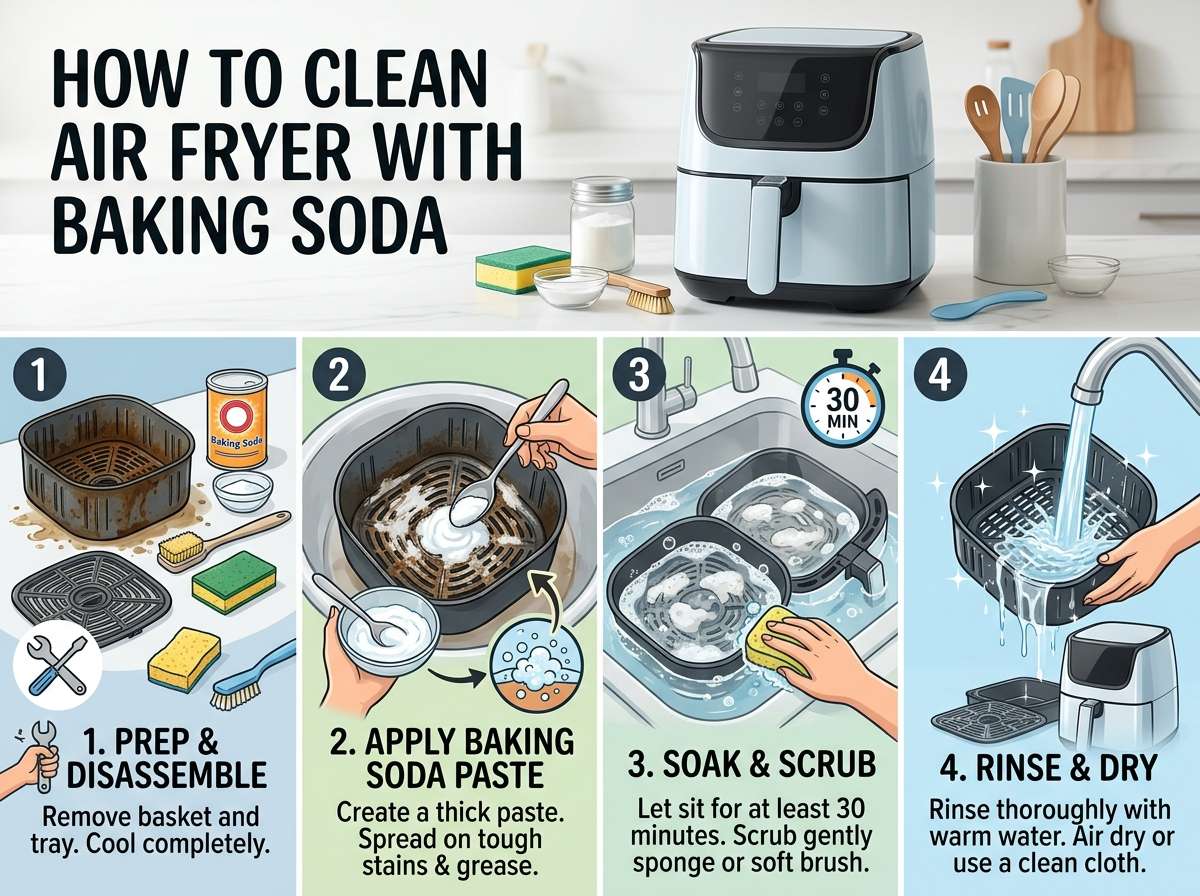
How to Clean Your Air Fryer with Baking Soda?
Your air fryer is one of your kitchen’s best friends. It makes crispy, delicious food without all that oil, and it cooks way faster than your oven ever could. But here’s the thing—like all kitchen appliances, your air fryer needs regular cleaning to keep working its best. The good news? You don’t need fancy chemicals or expensive products. Baking soda works like magic for air fryer cleaning and maintenance.
In this guide, I’ll walk you through everything you need to know about using baking soda to clean your air fryer. You’ll learn why baking soda is so effective, exactly how to use it, and some awesome tips to keep your machine in top shape. Let’s get started!
In this article
Why Baking Soda Is Perfect for Cleaning Your Air Fryer
Baking soda is basically a superstar when it comes to cleaning. Most people have a box sitting in their kitchen right now, so you probably already have what you need. But why is it so good for air fryer cleaning?
Baking soda is a natural abrasive, which means it can scrub away stuck-on food and grease without scratching your air fryer’s surfaces. It’s gentle enough that you won’t damage the non-stick coating inside your appliance, but tough enough to handle stubborn, burnt-on messes.
One of the best parts about using baking soda for air fryer deep cleaning is that it’s safe. Unlike harsh chemical cleaners, baking soda won’t create toxic fumes or leave behind harmful residue that could mix with your food. You can use it with total peace of mind around your family and pets.
Baking soda also eliminates odors. Air fryers can sometimes hold onto smells from stronger foods like fish or spicy dishes. A good baking soda clean will freshen up your appliance and get rid of those lingering scents. Plus, it costs just a few cents, so it’s incredibly budget-friendly compared to special air fryer cleaning products.
When You Should Clean Your Air Fryer
Keeping your air fryer clean isn’t just about making it look nice—it’s about making sure it works properly and safely. A dirty air fryer can have problems with heating, might cook food unevenly, and could create fire hazards if grease builds up too much.
You should do a quick rinse and wipe of the basket and tray after every single use. These removable parts usually come out easily, so take just two minutes to clean them right away while any food debris is still soft and easy to remove.
For a deeper clean with baking soda, you should do this about once a week if you use your air fryer a few times per week. If you cook in your air fryer every day, aim for a deep clean every few days. Heavy users who cook daily might even want to do a thorough baking soda cleaning twice a week.
Pay special attention to the heating element area and the bottom of the fryer basket. These spots tend to gather the most burnt-on food and grease buildup. If you notice any stubborn stains, discoloration, or that your fryer isn’t heating evenly anymore, it’s definitely time for a deep clean.
What You’ll Need to Get Started
The beauty of using baking soda for air fryer cleaning is that you don’t need to buy a bunch of supplies. Gather these simple items from around your house:
Baking soda – This is your main cleaning agent. Make sure you’re using food-grade baking soda if possible, especially since it might come into contact with surfaces where you cook food.
Water – Plain tap water works perfectly fine. You’ll use it to make a paste with the baking soda.
A small bowl – Any mixing bowl will do. You just need something to combine your baking soda and water.
Soft-bristled brush or sponge – This helps you apply the baking soda paste and scrub gently. A soft toothbrush works great for tight spaces.
Soft cloth or paper towels – You’ll use these to wipe away the paste and dry everything.
Rubber gloves (optional) – Gloves keep your hands clean and protect them from any irritation, though baking soda is very gentle.
Vinegar (optional) – White vinegar is a great partner for baking soda. Together they create a fizzing action that helps lift stubborn grime. It’s not required, but it’s helpful to have on hand.
Dish soap (optional) – A tiny amount of mild dish soap can help with greasy buildup.
That’s it! You probably have most or all of these things right now. No need to buy special air fryer cleaning kits.
Step-by-Step Guide to Cleaning Your Air Fryer with Baking Soda
Now let’s get into the actual cleaning process. I’ll break it down into easy steps so even if you’ve never cleaned an appliance before, you’ll know exactly what to do.
Step 1: Unplug Your Air Fryer and Let It Cool
Safety first! Always unplug your air fryer before you start any cleaning work. Your fryer needs to cool down completely if you just used it. Never try to clean a hot air fryer—you could burn yourself badly.
Let your air fryer sit for at least 30 minutes after you finish cooking. In the meantime, you can get all your supplies ready and make your baking soda paste. Check the basket and tray with your hand to make sure they’re cool enough to touch.
Step 2: Remove the Basket and Tray
Most air fryers have removable baskets and trays that come out super easily. Open your air fryer and simply pull out the basket. Then slide out the tray that sits underneath. These pieces are usually dishwasher safe, but since we’re doing a natural baking soda clean, we’ll clean them by hand.
If your model has any other removable parts, take those out now too. Some fryers have racks or dividers that you can remove. This gives you better access to all the nooks and crannies.
Step 3: Make Your Baking Soda Paste
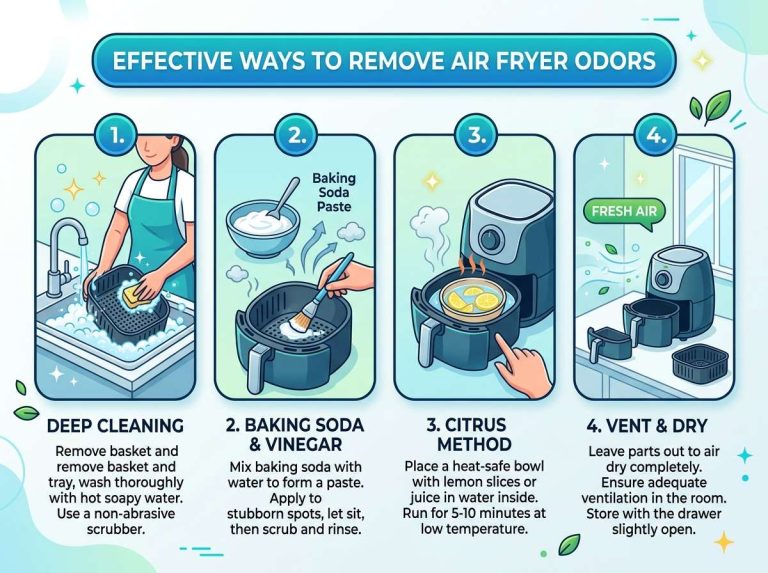
Pour about three to four tablespoons of baking soda into your small bowl. Add water slowly, stirring as you go. You want to create a paste that’s thick enough to stick to surfaces but thin enough to spread easily. Think of the consistency of peanut butter or thick cake batter.
If you want extra cleaning power, you can use equal parts baking soda and white vinegar. When you mix them together, they’ll fizz up quite a bit—that’s the chemical reaction happening, and it helps break down grease and grime. Just mix them in a bowl and work quickly since the fizzing doesn’t last long.
Step 4: Apply the Paste to the Basket and Tray
Using your soft brush or sponge, spread the baking soda paste all over the basket and tray. Make sure you get into all the crevices and corners where food particles like to hide. Don’t be shy—coat everything, but especially focus on spots with visible dirt or burnt-on food.
Pay extra attention to the bottom of the basket where grease tends to accumulate. Use your brush to work the paste into the perforations in the basket bottom. The holes let hot air flow, so keeping them clean is important for even cooking.
Step 5: Let It Sit
Now comes the easy part. Let your paste-covered basket and tray sit for 15 to 30 minutes. If you’re dealing with really stubborn, baked-on food, you can let it sit for up to an hour. This soaking time lets the baking soda do its job and break down the stuck-on gunk.
During this waiting time, you can work on cleaning the inside of your air fryer. See the next steps for that.
Step 6: Scrub and Remove the Paste
After the paste has sat, use your soft brush or sponge to scrub the basket and tray. Use gentle circular motions—you don’t need to scrub hard. The baking soda has already loosened the stuck-on food, so a light scrubbing should remove most of it.
For really tough spots, you might need to scrub a bit harder or let the paste sit longer. You can make a fresh batch of paste if needed and repeat the process.
Step 7: Rinse Thoroughly
Rinse the basket and tray under warm running water. Use your hands or a sponge to wipe away all the baking soda paste. Make sure you get into all those tiny holes and corners. You don’t want any baking soda residue left behind.
Keep rinsing until the water runs clear and you don’t see any white paste left on the surfaces. Dry everything with a clean cloth or paper towels.
Step 8: Clean the Inside of Your Air Fryer
While the basket and tray were soaking, you can clean the inside of the main unit. This is where the heating element lives, and it’s where a lot of grease and smoke can accumulate.
Make a fresh batch of baking soda paste using the same ratio as before. Using a soft brush (an old toothbrush works great for this part), apply the paste to the inside walls and surfaces of your air fryer. Get as much as you can reach safely.
If your air fryer has a heating element on the top, be extra careful around it. You don’t need to clean right on the element itself, but you can clean around it. Never pour liquid directly on the heating element.
Step 9: Let It Sit Again
Let the paste inside your air fryer sit for about 15 to 20 minutes. This gives the baking soda time to work on breaking down grease and grime inside.
Step 10: Wipe Out the Inside
Using a damp cloth or sponge, gently wipe out all the baking soda paste from inside your air fryer. You might need to do this several times to get everything out. Use a slightly damp (not soaking wet) cloth to avoid getting too much moisture in your appliance.
For tight corners and spaces, dampen your soft brush slightly and use it to brush out the paste. Take your time with this step to make sure you remove all the residue.
Step 11: Final Dry and Reassemble
Use a dry cloth to wipe everything down one more time. Make sure there’s no moisture or paste left inside the main unit or on the basket and tray.
Once everything is completely dry, put the tray back in first, then slide the basket back into place. Your air fryer is now clean and ready to use!
Extra Tips for Tough, Stuck-On Messes
Sometimes you’ll encounter food that’s really stuck on there. Don’t worry—baking soda can handle it with a few extra tricks.
The Vinegar and Baking Soda Combo creates powerful fizzing action. Mix equal parts baking soda and white vinegar in a bowl. It’ll bubble up right away. Quickly apply this to your dirty basket or tray and let it sit for 10 to 15 minutes. The fizzing helps lift stubborn deposits. This method works especially well for burnt cheese or caramelized food residue.
Soak Before Scrubbing – For really tough buildup, fill your sink with warm water and add a generous amount of baking soda. Place your basket and tray in the water and let them soak for 30 minutes to an hour. The long soak softens even the hardest stuck-on food. Then apply your baking soda paste and scrub as normal.
Make a Thicker Paste – If regular paste isn’t strong enough, use less water and make a thicker, more concentrated paste. This gives you more scrubbing power when you need it.
Use a Non-Scratch Scrub Pad – If a soft brush isn’t doing the job, try a non-scratch scrub pad or the soft side of a sponge. Just avoid anything abrasive that could damage your air fryer’s surfaces.
Let Vinegar Sit Longer – If you use the vinegar and baking soda combo, the longer it sits, the better it works. Try letting it sit for 30 minutes instead of 15 if you have the time.
How to Prevent Buildup and Make Cleaning Easier
The best approach to air fryer maintenance is preventing buildup in the first place. Less buildup means easier cleaning every time.
Line Your Basket – Use parchment paper cut to fit the bottom of your basket. This catches grease and food particles before they can stick to the basket itself. The paper burns off or gets crispy, and you can just throw it away after cooking. Your basket stays much cleaner this way. Just make sure the parchment stays secured and doesn’t blow around in the hot air.
Use Less Oil – The whole point of an air fryer is to cook with minimal oil, but some recipes call for a spray of oil. Try to use as little as possible. When less oil cooks and splatters, less grease builds up inside your fryer.
Clean Immediately After Cooking – Don’t let food sit in your basket overnight. Clean out loose debris right after you finish cooking while it’s still warm and hasn’t hardened. This one simple habit cuts your cleaning time in half.
Wipe Down the Heating Element Area – Use a barely damp cloth to wipe around the heating element and upper interior about once a week. This prevents smoke and grease from building up over time.
Use a Drip Tray Insert – Some air fryers come with drip tray inserts, or you can buy them separately. These catch all the grease and moisture that drips down. You just empty and clean the insert instead of dealing with a greasy main tray.
Spray Cooking Oil Lightly – If a recipe needs oil, use a spray bottle rather than pouring. This uses way less oil and creates less mess. Plus, the oil distributes more evenly.
Dry Your Food Before Cooking – Pat meat and vegetables dry with paper towels before cooking. Wet food releases more moisture, which creates steam and grease splatters.
Common Questions About Air Fryer Cleaning
Can I use baking soda on the heating element? You should avoid applying baking soda directly on the heating element itself. However, you can clean around it and use baking soda throughout the rest of the interior. If you need to clean the heating element area, use a barely damp cloth to wipe it gently.
Is it safe to use baking soda on non-stick surfaces? Yes! Baking soda is gentle enough for non-stick coatings. It’s abrasive enough to clean but won’t scratch or damage the non-stick finish. This is one of the reasons baking soda is so perfect for air fryer cleaning.
How often should I do a deep clean versus a quick clean? Do a quick clean (just rinsing and wiping) after every use. Do a deep baking soda clean once a week for regular users, or every few days if you use your air fryer daily.
Can I put the basket in the dishwasher instead of hand cleaning? Most baskets are dishwasher safe according to manufacturer instructions. However, hand washing with baking soda often works better for tough buildup and helps you see exactly how clean everything is.
What if my air fryer still smells after cleaning? Baking soda is excellent at eliminating odors. If a smell lingers, do another baking soda cleaning and let the paste sit longer. You can also place an open box of baking soda inside your unplugged, cool air fryer overnight to absorb remaining odors.
Can I use baking powder instead of baking soda? No, baking powder is different. Stick with baking soda, which is sodium bicarbonate. Baking powder contains other ingredients and won’t clean as effectively.
Is white vinegar necessary for the cleaning? Vinegar is helpful but not required. Baking soda alone works great. The vinegar just adds extra cleaning power through the chemical fizzing reaction. Use it if you have it, but don’t feel like you need to buy it just for this purpose.
What about cleaning the outside of my air fryer? For the exterior, a simple damp cloth with a tiny bit of baking soda works well. You can also just use soapy water. Wipe it down and dry it with a cloth. Keep it simple for the outside.
The Benefits of Regular Air Fryer Cleaning
Taking time to clean your air fryer regularly with baking soda offers you lots of benefits beyond just having a clean appliance.
Better Tasting Food – A clean air fryer cooks food more evenly and won’t add burnt flavors from old grease to your meals.
Longer Appliance Lifespan – Regular maintenance helps your air fryer last for years. Grease and food buildup can damage components over time, so cleaning extends the life of your investment.
Even Cooking Results – When air can flow properly around your food without grease blocking vents, your meals cook more evenly every single time.
Safer Operation – Excess grease buildup can become a fire hazard. Regular cleaning keeps your appliance operating safely.
Better Appearance – Your kitchen looks nicer when your appliances are clean and shiny.
Healthier Meals – Old grease and burnt food particles can affect the healthiness of what you cook. A clean fryer means healthier food for your family.
Money Savings – Baking soda costs pennies. You’re not buying expensive cleaning products, and you’re keeping your fryer in good shape so it lasts longer before you need to replace it.
Wrapping It Up
Cleaning your air fryer with baking soda is one of the easiest, cheapest, and most effective ways to keep your kitchen appliance in perfect condition. You probably have everything you need right now in your kitchen. The process is simple enough that even beginners can handle it, and the results are amazing.
Start by doing a deep clean with baking soda this week. Do your quick daily rinses and a deeper baking soda clean once weekly, and you’ll have a spotless, sweet-smelling air fryer that works like new. Your food will taste better, your appliance will last longer, and you’ll save money by not buying specialty cleaning products.
Baking soda proves that you don’t need complicated, expensive solutions for everyday household tasks. Sometimes the simplest, most natural options work best. So grab that box of baking soda, set aside 30 minutes, and give your air fryer the cleaning it deserves. You’ll be amazed at the difference it makes.

Mary is a home cooking enthusiast and kitchen appliance reviewer who loves helping people find the best tools for everyday meals. She enjoys testing air fryers, deep fryers, and other cooking appliances while sharing honest reviews and practical buying advice. Through FryerPick.com, Mary provides expert guides, product comparisons, and cooking tips to help readers choose the right fryer for their kitchen.