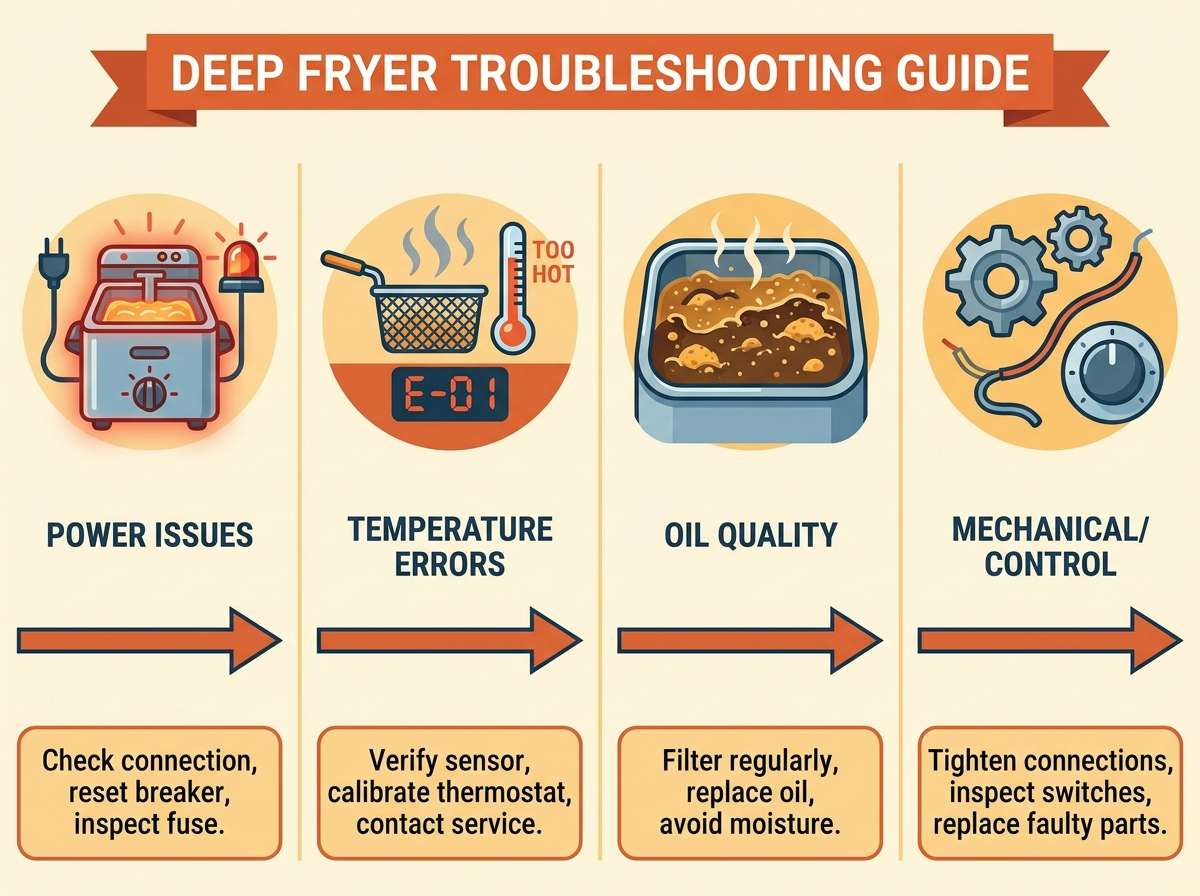
Deep Fryer Troubleshooting
A deep fryer can turn out crispy fries, golden chicken, and crunchy snacks in just a few minutes. But like any kitchen tool, it can act up from time to time. The oil might smoke too much, the food might come out soggy, or the fryer might not heat up at all. These issues can feel annoying, but most of them have easy fixes.
This guide walks you through the most common deep fryer problems and shows you how to solve them step by step. By the end, you will know how to spot the warning signs early, keep your fryer running smoothly, and get that perfect crunch every single time.
In this article
Why Deep Fryer Troubleshooting Matters
A fryer that is not working right does not just ruin your food. It can waste oil, use more power, and even become a safety risk. Bad wiring, dirty oil, or a broken thermostat can lead to fires or burns if left unchecked. So learning basic troubleshooting steps is not just about better food. It is also about keeping your kitchen safe.
Home cooks and small restaurant owners both face the same headaches with fryers. The good news is that most fixes do not need a repair technician. With a bit of patience and the right steps, you can solve almost every issue yourself.
Common Deep Fryer Problems and Their Fixes
1. The Fryer Won’t Heat Up
This is one of the most common complaints. You plug it in, wait, and nothing happens. The oil stays cold no matter how long you wait.
Possible causes:
- The power outlet is not working
- The heating element is burnt out
- The thermostat is broken
- The fryer is not plugged in all the way
How to fix it: Start with the easy stuff first. Check the outlet by plugging in another device to see if it works. Make sure the plug is fully pushed in and the switch is turned on. If the outlet works fine, the problem might be inside the fryer itself.
Open the unit (only after unplugging it) and look at the heating element. If it looks cracked, discolored, or damaged, it likely needs to be replaced. A broken thermostat can also stop the fryer from heating, since it controls when the heat turns on and off. If you are not comfortable opening the fryer, it is best to call a repair service or check the warranty.
2. Oil Won’t Reach the Right Temperature
Sometimes the fryer heats up, but the oil never gets hot enough to fry properly. This leads to soggy, greasy food instead of crispy bites.
Possible causes:
- Too much oil in the fryer
- A faulty thermostat
- The fryer is set to a low temperature
- Old or dirty oil
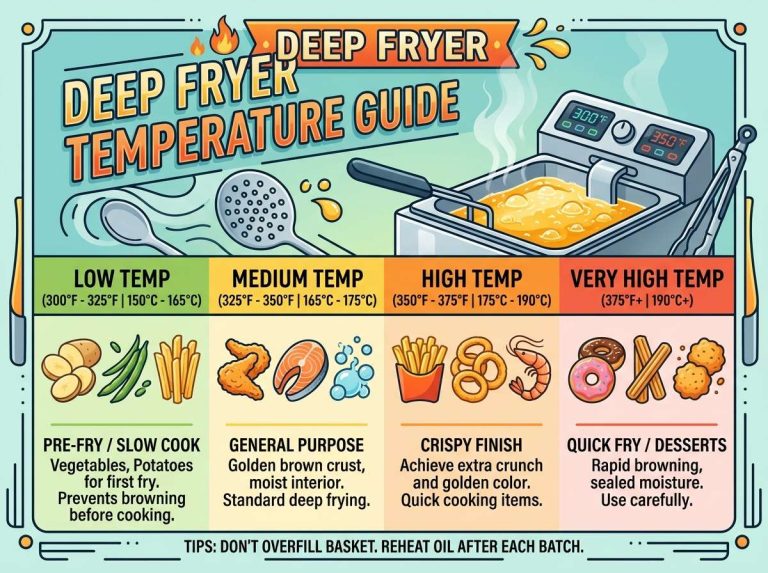
How to fix it: Check the oil level first. Too much oil can slow down heating and mess with the temperature reading. Follow the fill line marked inside the fryer basket or tank. Next, check the temperature dial and make sure it is set correctly for what you are cooking. Most fries and chicken need around 350 to 375 degrees Fahrenheit.
If the dial is set right but the oil still stays cool, the thermostat could be worn out. A kitchen thermometer can help you confirm this. Just drop it into the oil and compare the reading with what the fryer dial shows. A big gap between the two numbers is a clear sign the thermostat needs replacing.
Old oil can also cause temperature problems since it breaks down over time and does not heat evenly. Swap it out for fresh oil if it has been used many times already.
3. Food Comes Out Soggy Instead of Crispy
You expect crunchy fries, but instead you get limp, oily food. This is a common frustration.
Possible causes:
- Oil temperature is too low
- Too much food added at once
- Food was not dried before frying
- Old or overused oil
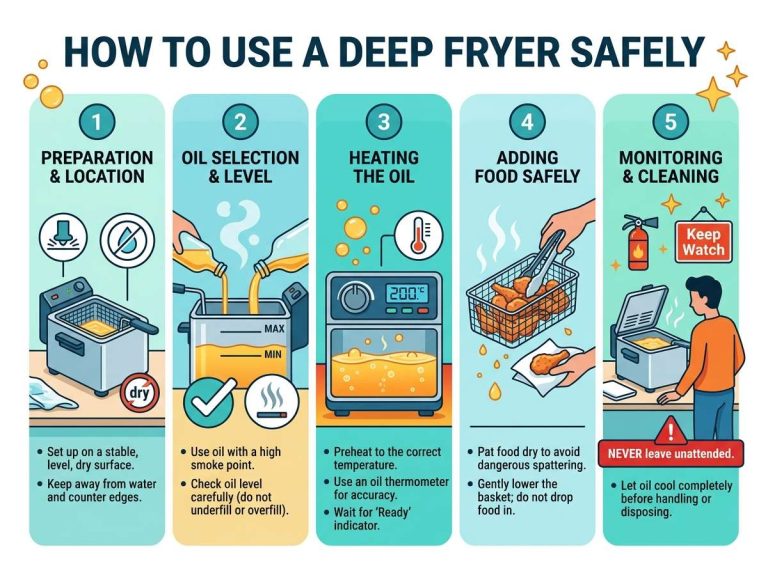
How to fix it: Soggy food almost always points to low oil temperature. When you drop cold food into oil that is not hot enough, the food soaks up oil instead of cooking fast on the outside. Always let the oil reach the right temperature before adding food.
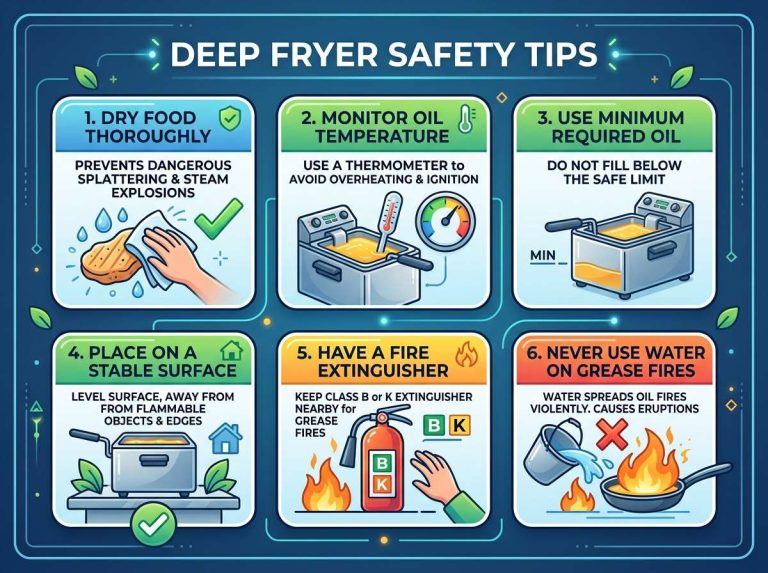
Adding too much food at once also drops the oil temperature quickly. Fry in small batches so the oil stays hot and each piece gets crispy on all sides. Pat your food dry with a paper towel before frying too, since wet food lowers the oil temperature and causes extra splattering.
Lastly, check how many times you have reused the oil. Oil that has been used again and again loses its ability to fry food properly. A good rule is to change the oil after eight to ten uses, or sooner if it smells off or looks dark.
4. The Oil Smokes Too Much
A little steam is normal, but heavy smoke coming from your fryer is a warning sign that should not be ignored.
Possible causes:
- The oil is overheated
- The oil has reached its smoke point
- Old or dirty oil
- Food particles burning in the oil
How to fix it: Every oil type has a smoke point, which is the temperature where it starts to break down and produce smoke. Vegetable oil, canola oil, and peanut oil all have different smoke points, so pick one that matches your frying needs. If your oil keeps smoking at normal frying temperatures, lower the heat setting a bit and see if that solves it.
Old oil smokes more easily than fresh oil because it has already started breaking down. Small bits of leftover food floating in the oil can also burn and cause smoke, so strain your oil often using a fine mesh strainer or cheesecloth to remove debris after each use.
5. Oil Overflows or Bubbles Too Much
Oil bubbling over the edge of the fryer is messy and dangerous. It can burn skin, damage the fryer, and create a fire hazard on the stovetop or counter.
Possible causes:
- Too much oil in the tank
- Wet food added to hot oil
- Frying too much food at once
- Oil that has broken down and foams easily
How to fix it: Never fill your fryer past the max line. Oil expands and bubbles up once food is added, so leaving extra space at the top gives it room to rise without spilling over. Always dry your food fully before frying since water droplets cause instant, aggressive bubbling when they hit hot oil.
Frying too much food at once also causes overflow because the oil level rises with each piece added. Stick to small batches, and give the oil a moment to settle between rounds. If your oil foams constantly even with dry food and correct oil levels, it may be time to replace it, since old oil naturally foams more due to broken-down fat molecules.
6. Strange Smells or Burning Odor
A burning smell from your fryer is never something to brush off. It usually points to a real problem that needs quick attention.
Possible causes:
- Old, overused oil
- Food debris stuck to the heating element
- Electrical issue inside the unit
- Oil residue burning on a hot surface
How to fix it: Old oil often smells sharp, bitter, or rancid once it has broken down from repeated use. If your oil smells off, toss it out and start fresh. Also check the heating element and inside walls of the fryer for stuck bits of food, since these can burn and create a bad smell over time. Clean the fryer thoroughly after each use to avoid this buildup.
If the smell seems more like burning plastic or wires rather than food, stop using the fryer right away. This points to an electrical issue, and using the unit further could be risky. Unplug it and have it checked by a professional before turning it on again.
7. The Fryer Trips the Circuit Breaker
If your fryer keeps tripping the breaker, it is drawing more power than the circuit can handle, or there is a fault somewhere in the wiring.
Possible causes:
- The fryer is on the same circuit as other high-power appliances
- A short circuit inside the fryer
- A damaged power cord
- The fryer’s wattage is too high for the outlet
How to fix it: Check what else is plugged into the same circuit. Fryers pull a lot of power, and running one alongside a microwave or toaster on the same line can overload the breaker. Plug the fryer into its own outlet if you can, ideally on a dedicated circuit.
Look over the power cord for any cuts, fraying, or exposed wires. A damaged cord can cause a short circuit, which trips the breaker as a safety measure. If the cord looks fine and the fryer is on its own circuit but still trips the breaker, there could be an internal fault. In that case, stop using it and get it looked at by someone qualified in appliance repair.
8. Oil Turns Dark Too Quickly
Oil naturally darkens with use, but if it goes from clear to deep brown after just one or two fries, something else may be going on.
Possible causes:
- Frying at too high a temperature
- Frying foods with heavy breading or seasoning
- Leftover food particles burning in the oil
- Poor oil quality from the start
How to fix it: High heat speeds up oil breakdown, so keep your temperature within the recommended range for what you are cooking. Heavily breaded or seasoned foods shed crumbs and spices into the oil, and these bits burn fast and darken the oil. Try shaking off extra breading before frying, and strain the oil after each session to remove any leftover bits.
Cheap or low-grade oils also tend to darken faster than higher-quality options. Oils like peanut oil or refined vegetable oil tend to hold up better over repeated use compared to cheaper blends.
9. Uneven Cooking
Some pieces of food come out perfectly golden while others stay pale or undercooked in the same batch. This uneven result is often tied to how the fryer heats and how the food is arranged.
Possible causes:
- Overcrowding the basket
- Uneven oil temperature
- Food pieces of different sizes
- A faulty heating element that heats unevenly
How to fix it: Give your food space in the basket so hot oil can flow around each piece evenly. Overcrowding traps steam and blocks proper heat flow, leading to spots that stay soft instead of crisp. Cut your food into similar sizes too, since smaller pieces cook faster than larger ones and will finish unevenly if mixed together.
If you are using an oil thermometer, check different spots in the tank to see if the temperature stays the same throughout. Big differences in heat across the tank often point to a heating element that is starting to fail and may need replacing.
10. Oil Leaks From the Fryer
A leaking fryer is both messy and unsafe, since hot oil dripping out can cause burns or slip hazards.
Possible causes:
- Cracked or damaged tank
- Worn-out seals or gaskets
- Overfilled oil tank
- Loose drain valve
How to fix it: Check the drain valve first, since this is often the main culprit. Make sure it is fully closed and tightened. If your fryer has a removable oil tank, inspect the seals and gaskets for cracks or wear, as these tend to break down over time with heat exposure. Replacing a worn gasket is usually a quick and cheap fix.
Look closely at the tank itself for any visible cracks or damage. A cracked tank cannot be patched safely and will need a full replacement. Also double check that you are not overfilling the tank past its recommended line, since excess oil adds pressure that can force leaks through weak points.
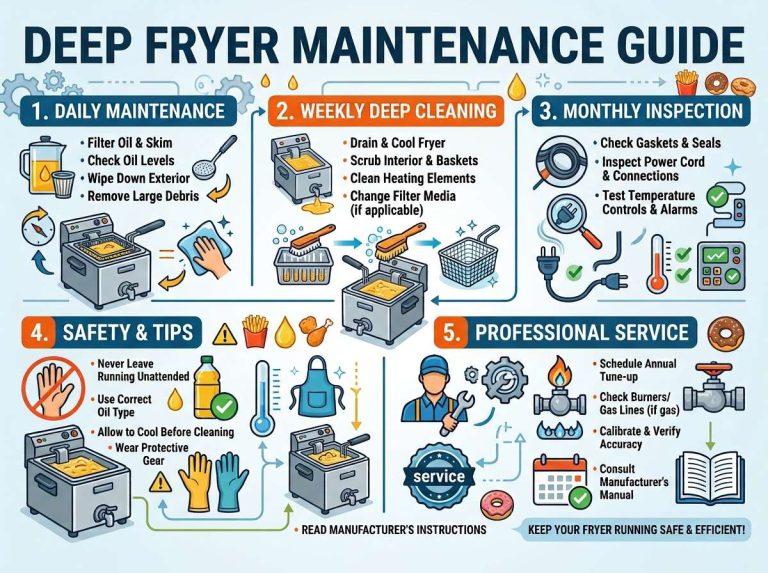
Simple Maintenance Tips to Prevent Future Problems
A little care goes a long way in keeping your fryer working well for years. Here are some easy habits to build into your routine:
- Strain the oil after every use to remove crumbs and bits of food that burn and darken the oil over time.
- Clean the fryer basket and tank with warm, soapy water after it cools down completely.
- Check the oil level before every use to avoid overflow or slow heating.
- Store oil properly in a cool, dark spot if you plan to reuse it, and always keep it covered to block dust and moisture.
- Replace oil regularly, ideally every eight to ten uses, or sooner if it smells bad or looks murky.
- Inspect the power cord now and then for cracks, fraying, or loose connections.
- Avoid moving the fryer while hot, as sudden shifts can spill oil or damage internal parts.
These small steps take just a few extra minutes but can save you from bigger headaches down the road.
When to Call a Professional
Most fryer issues can be handled at home with basic tools and a bit of patience. Still, some problems are best left to a trained technician. If you smell burning plastic, notice sparks, see exposed wires, or your fryer keeps tripping the breaker even on its own circuit, stop using it right away and reach out for professional help. Electrical problems inside a fryer are not worth the risk of fixing on your own if you are not experienced with appliance repair.
For gas-powered fryers, any smell of gas or trouble with the pilot light also calls for expert attention rather than a DIY fix.
Final Thoughts
Deep fryer troubles are common, but they rarely mean you need a brand new machine. Most problems trace back to a few simple causes: dirty or old oil, wrong temperature settings, overcrowding, or worn-out parts like seals and heating elements. With regular cleaning, fresh oil, and a bit of attention to warning signs, your fryer can serve up crispy, golden food for a long time.
Next time your fryer acts up, run through this list before assuming the worst. Check the basics first, like power, oil level, and temperature settings, then move on to more specific fixes based on what you are seeing. A well-kept fryer means better food, safer cooking, and fewer trips to buy a replacement.

Mary is a home cooking enthusiast and kitchen appliance reviewer who loves helping people find the best tools for everyday meals. She enjoys testing air fryers, deep fryers, and other cooking appliances while sharing honest reviews and practical buying advice. Through FryerPick.com, Mary provides expert guides, product comparisons, and cooking tips to help readers choose the right fryer for their kitchen.