Deep Fryer Maintenance Guide
A deep fryer can turn out crispy fries, golden chicken, and crunchy snacks that taste better than anything from a takeout box. But that crispy magic only keeps happening if you take care of the machine behind it. Skip the cleaning and upkeep for too long, and you end up with burnt oil smells, sluggish heating, and food that tastes off no matter how good your recipe is.
The good news is that deep fryer maintenance isn’t hard. It just takes a little routine and some basic know-how. This guide walks you through everything from daily wipe-downs to deep cleans, oil care, filter changes, and troubleshooting, so your fryer stays safe, efficient, and ready to cook whenever you are.
In this article
Why Deep Fryer Maintenance Actually Matters
Before jumping into the how-to, it helps to know why this stuff matters in the first place. A dirty or neglected fryer isn’t just gross, it’s a real problem for your food, your wallet, and your safety.
Old oil breaks down over time. As it heats and cools again and again, it starts to smoke at lower temperatures, turn dark, and pick up a rancid smell. That breakdown, called oxidation, changes the flavor of everything you cook. Fries that should taste light and crisp end up tasting greasy or bitter instead.
Leftover food particles and crumbs sitting in the oil also burn every time you heat it back up. Those burnt bits stick to your food and give it a scorched taste. On top of that, a fryer packed with grime works harder to heat up, which means it uses more energy and wears out faster.
Then there’s the safety side. Grease buildup around heating elements can be a fire risk, especially in fryers that see daily use. Regular care keeps that risk low and keeps your kitchen safer overall.
Basically, a well-maintained fryer saves you money on oil, protects your appliance, and makes your food taste the way it’s supposed to.
Daily Deep Fryer Care
Daily care is the small stuff you do after almost every use. It doesn’t take long, but it makes a huge difference over time.
Let the oil cool before touching anything. Hot oil is dangerous, and rushing this step is how burns happen. Give your fryer at least 30 minutes to cool down after you’re done cooking.
Skim out food debris. Use a fine mesh strainer or a slotted spoon to scoop out any leftover crumbs, batter bits, or breading floating in the oil. These little pieces burn fast and taste bad the next time you fry, so don’t skip this step even if you’re tired.
Wipe down the exterior. A damp cloth with a bit of mild soap takes care of any splatters or grease on the outside of the unit. Dry it off right after so water doesn’t sit near any electrical parts.
Check the oil level. Oil evaporates a little with each use, especially if you’re frying wet foods. Top it off as needed so your fryer heats evenly and your food cooks properly.
Store the oil properly if you’re not frying again soon. If you plan to reuse the oil, strain it into a clean, airtight container and keep it in a cool, dark spot. Light and heat speed up spoilage, so a pantry shelf works better than leaving it near the stove.
Weekly Deep Fryer Maintenance
Once a week, your fryer needs a bit more attention than a quick wipe. This is where you catch problems before they turn into bigger ones.
Inspect the oil color and smell. Fresh oil is usually light gold or amber. As it ages, it darkens and can start to smell sharp or slightly burnt. If it looks murky or smells off, it’s probably time to change it, even if it hasn’t hit your usual replacement schedule.
Filter the oil. Straining oil through a fine mesh strainer or a coffee filter removes tiny particles that a regular skim misses. This step alone can stretch the life of your oil by quite a bit, since those leftover bits are what speed up spoilage.
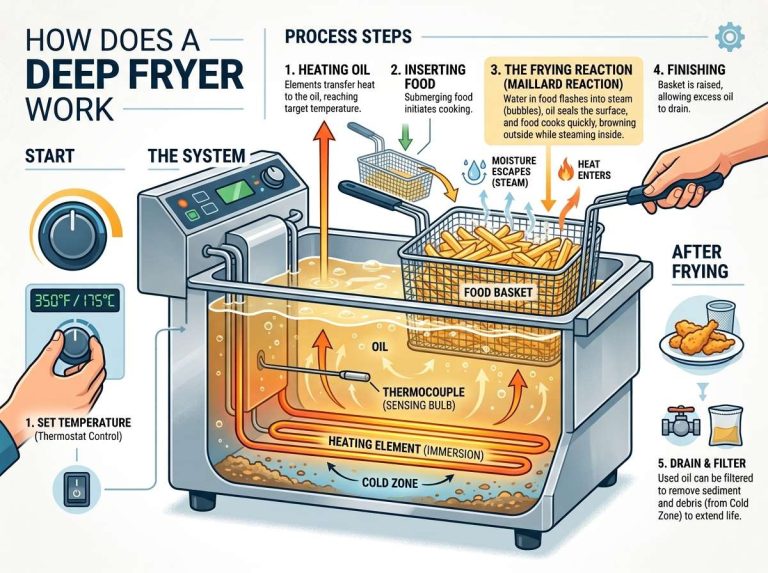
Check the heating element. Unplug the fryer first, then look at the heating coil or element for any grease buildup or residue. A soft brush or cloth works well for gently removing gunk without scratching the surface.
Look over the basket and lid. Grease tends to collect around hinges, handles, and the edges of the basket. A quick scrub with warm soapy water keeps these parts moving smoothly and stops grease from hardening into a sticky mess.
Deep Cleaning Your Fryer
Every few weeks, depending on how often you fry, your fryer needs a full deep clean. This is the process that gets rid of built-up grease, restores that new-fryer shine, and helps your unit last for years instead of months.
Step 1: Drain and Dispose of the Oil
Start by draining all the oil out of the fryer. If the oil still looks decent, strain it and save it for later use. If it’s dark, thick, or smells burnt, it’s time to toss it. Never pour oil down the sink or drain, since it hardens and clogs pipes over time. Pour it into a sealed container and toss it with your regular trash, or check if your area has an oil recycling program.
Step 2: Remove Removable Parts
Take out the basket, oil reservoir if it’s removable, and any other detachable pieces. Most of these parts can go into warm, soapy water to soak while you handle the rest of the fryer.
Step 3: Wash the Removable Parts
Scrub the basket and other removable parts with a soft sponge and dish soap. For stubborn grease, a paste made from baking soda and water works wonders. Just rub it on, let it sit for about 10 minutes, then scrub and rinse.
Step 4: Clean the Interior
Wipe down the inside of the fryer with a cloth dipped in warm, soapy water. Avoid soaking the base of countertop electric fryers, since water near the heating element can cause damage or create a shock hazard. For stubborn grease spots inside, that same baking soda paste works here too.
If your fryer has a removable oil reservoir, this part can usually handle a more thorough wash since it’s separate from the electrical components.
Step 5: Clean the Heating Element (Electric Fryers)
Unplug the unit and let it cool completely before touching the heating element. Gently wipe it with a damp cloth to remove any grease film. Avoid submerging this part in water, and never use anything sharp or abrasive on it since that can damage the coating.
Step 6: Dry Everything Thoroughly
Water left behind in a fryer causes oil to splatter dangerously the next time you fry. Dry every part completely with a clean towel, and let everything air dry for a bit longer before putting it back together. A fully dry fryer is a safe fryer.
Step 7: Reassemble and Add Fresh Oil
Once everything is bone dry, put the basket, reservoir, and other parts back in place. Add fresh oil, or your filtered and saved oil if it’s still in good shape, and you’re ready to fry again.
How Often Should You Change the Oil
This depends a lot on what you’re frying and how often. As a general guide:
- If you fry mostly light foods like fries or vegetables, oil can usually handle 8 to 10 uses before it needs replacing.
- If you fry breaded or battered foods, or things like fish that have a strong smell, oil breaks down faster and might only last 3 to 5 uses.
- Commercial-style frying done daily often calls for oil changes every few days, depending on volume.
A simple rule to remember: if the oil smells rancid, looks dark and cloudy, foams up more than usual, or smokes at a lower temperature than before, it’s done. Trust your senses here more than a strict number, since usage varies so much from kitchen to kitchen.
Filter Maintenance and Ventilation
If your fryer has a filter for the exhaust or vent, don’t forget about it. Grease particles collect in these filters fast, and a clogged filter reduces airflow, which can make your fryer run hotter than it should and increase fire risk.
Most filters can be removed and washed with warm soapy water, then air dried before putting them back. Check your fryer’s manual for the exact filter type, since some are washable and others need full replacement every so often.
If you’re using your fryer indoors regularly, keeping the surrounding area ventilated also helps cut down on grease film building up on nearby surfaces, cabinets, and walls.
Common Deep Fryer Problems and Fixes
Even with good care, fryers run into hiccups now and then. Here’s how to handle the most common ones.
Oil smokes too soon. This usually means the oil is old and needs changing, or the temperature setting is too high for the type of oil you’re using. Different oils have different smoke points, so double check that yours matches what your recipe calls for.
Food comes out soggy instead of crispy. This often points to oil that’s too cool, or a fryer that’s overcrowded with food. Fry in smaller batches and give the oil time to come back up to temperature between batches.
Fryer takes forever to heat up. Grease buildup on the heating element is a common culprit here. A deep clean often solves this issue quickly.
Strange smells while cooking. Old oil is usually to blame, but leftover food debris stuck in corners can also cause this. A thorough clean and fresh oil almost always fix it.
Basket handle feels loose or sticky. Grease can seep into hinges and joints over time. Regular cleaning around these areas, along with a drop of food-safe lubricant if needed, keeps things moving smoothly.
Tips to Make Your Oil Last Longer
Since oil is one of the bigger ongoing costs of frying, a few habits go a long way in stretching its life:
- Pat food dry before frying, since excess water speeds up oil breakdown.
- Avoid frying at temperatures higher than needed, since overheating shortens oil life fast.
- Keep the fryer covered when not in use to limit exposure to air and light.
- Strain oil after every single use, not just once a week.
- Never mix old oil with new oil, since the older oil speeds up spoilage of the fresh batch.
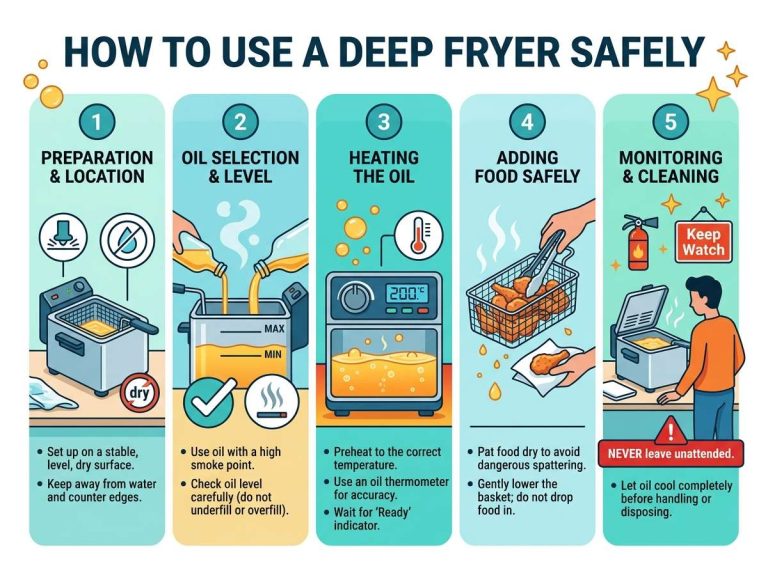
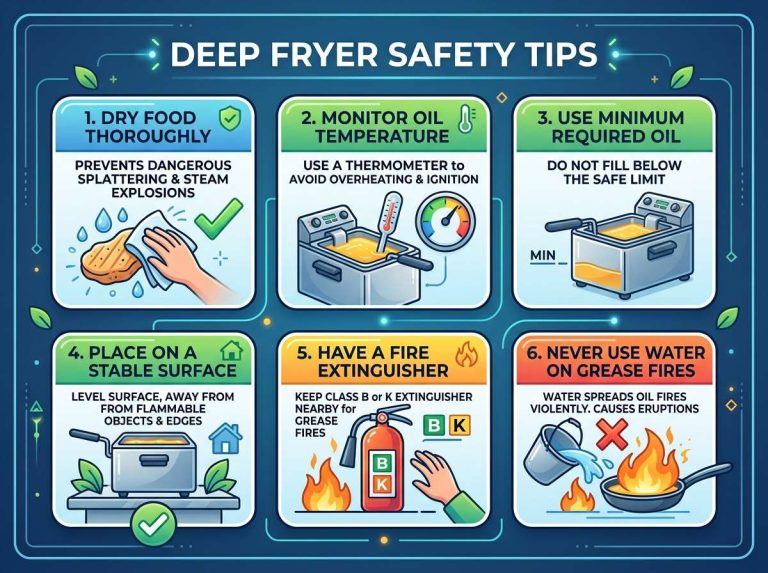
Safety Reminders Worth Repeating
A few safety basics are worth keeping in mind every time you cook or clean:
- Always let oil cool fully before draining, cleaning, or moving the fryer.
- Keep water far away from hot oil, since even a small amount can cause dangerous splattering.
- Never leave a fryer unattended while it’s on.
- Keep a fire extinguisher rated for grease fires nearby, just in case.
- Unplug electric fryers before doing any cleaning near the heating element.
Building a Simple Maintenance Routine
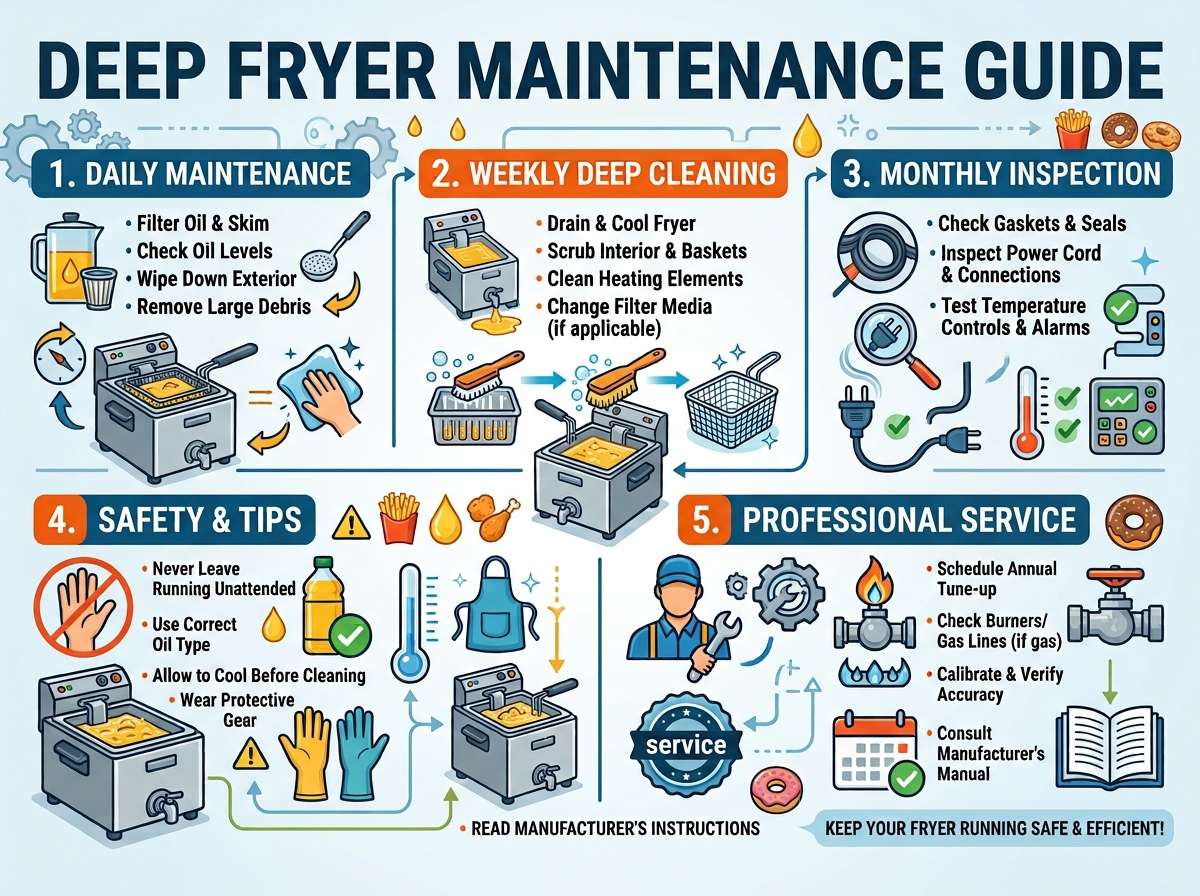
The easiest way to stay on top of fryer care is to build small habits instead of treating it as a big chore. Try something like this:
- After each use: skim debris, wipe the outside, check oil level.
- Once a week: filter the oil, check the heating element, clean the basket and lid.
- Every few weeks (or sooner with heavy use): full deep clean, oil change, filter check.
Sticking to a routine like this means you rarely deal with a fryer that’s in bad shape, and cleaning never feels overwhelming since you’re only handling a little at a time.
Final Thoughts
Taking care of a deep fryer really comes down to a few simple habits repeated consistently. Skim after every use, filter and check the oil weekly, and give the whole unit a proper deep clean every few weeks. Pair that with fresh oil changes and a bit of attention to the heating element and filters, and your fryer will keep turning out crispy, great-tasting food for a long time.
A little routine care goes further than most people expect. It saves money on oil, keeps your kitchen safer, and honestly makes frying at home a lot more enjoyable when your equipment is working the way it should.

Mary is a home cooking enthusiast and kitchen appliance reviewer who loves helping people find the best tools for everyday meals. She enjoys testing air fryers, deep fryers, and other cooking appliances while sharing honest reviews and practical buying advice. Through FryerPick.com, Mary provides expert guides, product comparisons, and cooking tips to help readers choose the right fryer for their kitchen.